Appearance
Blog - grid
This guide describes setting up the Blog - grid section.
Use the section to set how blog posts are displayed, and arranged in a grid layout, on pages created from the (blog) Grid template.
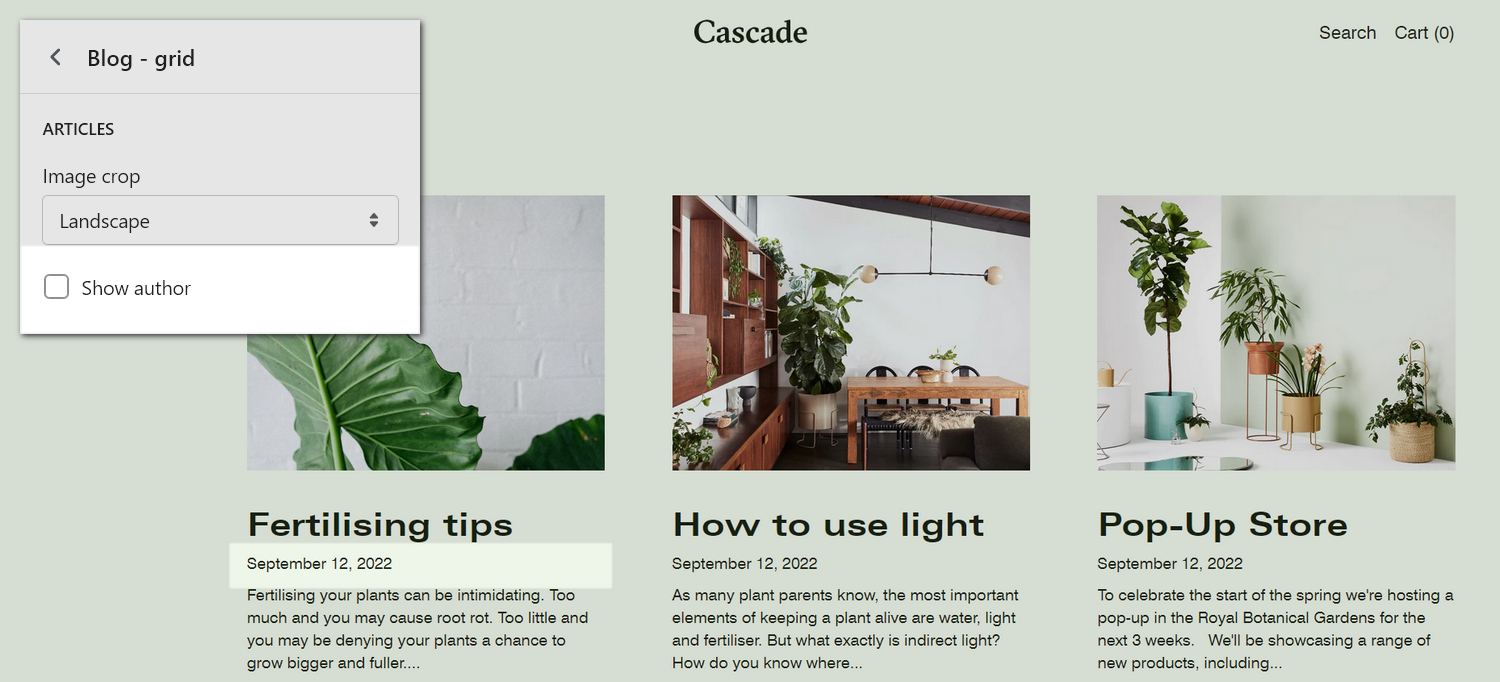
The previous image shows a Blog - grid section on a store's (blog) Grid page. In the top right, part of Theme editor's section menu is displayed. The menu's Show author checkbox option is set to off. This option hides the name of each blog article's writer, inside the section. Typically, the author names are displayed above the posting date for each blog article.
For general guidance with modifying sections, refer to Sections overview, and Shopify help: Sections and blocks.
Set up a blog - grid section
To set up a Blog - grid section:
Go to Customize theme.
In Theme editor, at the top of the page, use the dropdown to select Blogs > Grid.
Note
The section is available only on the Blogs > Grid page.
To add Content sections into the current page, select Add section, from the side menu, and then choose a section to add. Refer to Shopify help: Add a section.
From the side menu, select Blog - grid.
Select a section setting described in the following table.
| Section setting name | Description |
|---|---|
| Maximum number of posts per page | Adjust the slider Maximum number of posts per page to set the maximum number of blog posts (articles) to display inside the section. The slider values range from 6 to 18. |
| Enable filtering by tag | Select the Enable filtering by tag checkbox to show/hide the blog post filtering options inside the section. With this setting enabled, visitors can select a range of articles, within a blog, by using article tags as filtering criteria. Refer to Shopify help: Creating and using tags in Shopify. |
| Show RSS link | Select the Show RSS link checkbox to show/hide a link for Really Simple Syndication inside the section. Refer to Shopify help: Invite customers to subscribe to your blog. |
| Articles > Image crop | Use the Image crop dropdown to set a (cropping) shape for images inside the section's blog post tiles. The dropdown options are No crop, Portrait, Square, and Landscape. |
| Articles > Tiles format | Use the Tiles format options to specify a display style for the section's article tiles. To display only an article's title and image inside the section, select Minimal. To display additional article details inside the section, like author, date and excerpt, select Detailed. |
| Articles > Show author | Select the Show author checkbox to show/hide the name of each blog article's writer, inside the section. To use this setting, set the Tiles format option to Detailed. |
| Articles > Show date | Select the Show date checkbox to show/hide each blog article's posting date, inside the section. To use this setting, set the Tiles format option to Detailed. |
| Articles > Show excerpt | Select the Show excerpt checkbox to show/hide a summary of each blog article, inside the section. To use this setting, set the Tiles format option to Detailed. |
| Articles > Show comment count | Select the Show comment count checkbox to show/hide the total number of comments associated with each blog article, inside the section. The comment count displays only if comments are enabled for the blog, and the blog article has comments. To use this setting, set the Tiles format option to Detailed. |
| Articles > Show tags | Select the Show tags checkbox to show/hide tags associated with each blog article, inside the section. Refer to Shopify help: Creating and using tags in Shopify. To use this setting, set the Tiles format option to Detailed. |
| Articles > Show "Read more" text | Select the Show read more text checkbox to show/hide a Read more button for each blog article, inside the section. Store visitors select the button to access a full blog article. To use this setting, set the Tiles format option to Detailed. |
| Color > Color scheme | Use the Color scheme options to select a color scheme for the section. Refer to Colors. |
| Theme settings | If available, select Theme settings to access additional settings for the section. Refer to Section theme settings menu. |
| Custom CSS | Select Custom CSS. In the box, enter custom CSS styles to apply only to the current section. Refer to Shopify help: Add custom CSS. To apply custom styles to your entire online store, refer to Theme settings > Custom CSS. |