Skip to content

Header

This guide describes setting up the Header section.

Use the section to provide visitors with a menu for navigating the pages in your store. The header section is typically displayed across the top of store pages.

An example Header section on a store's homepage.

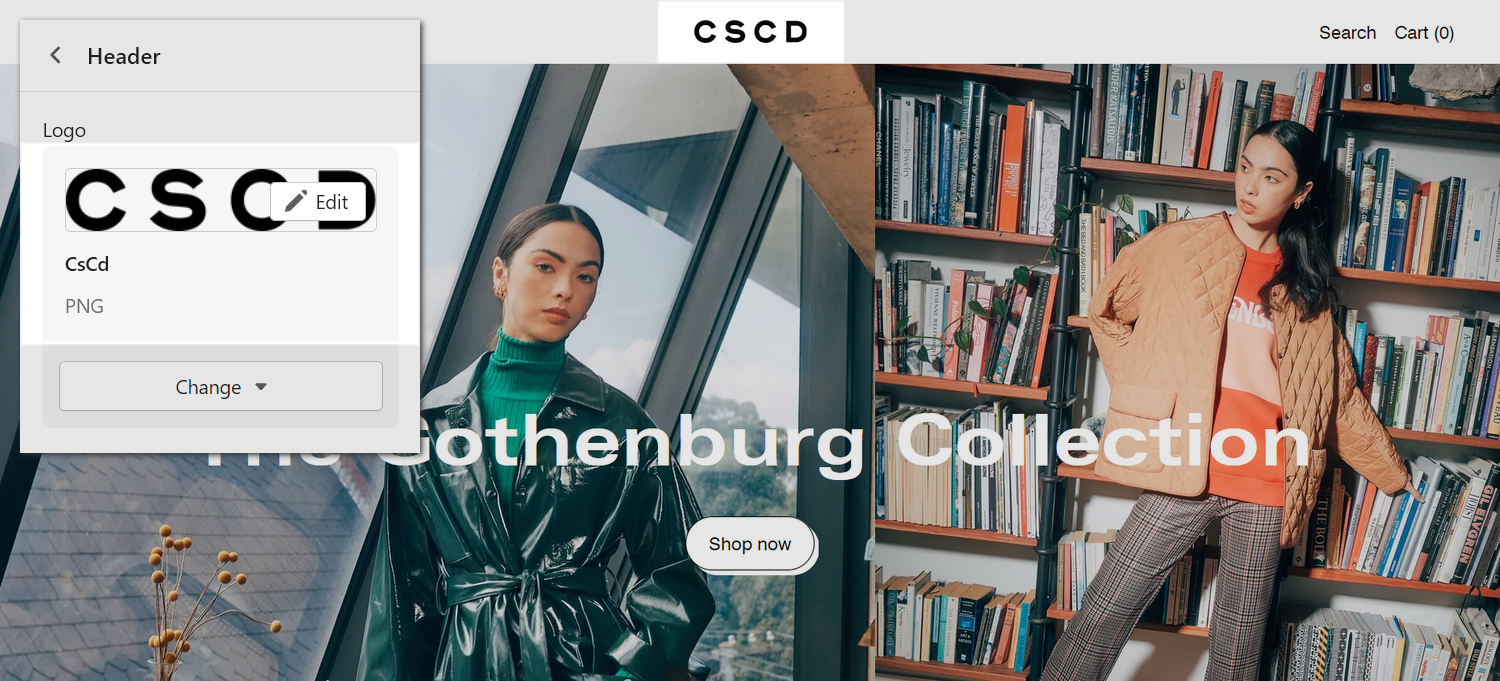
The previous image shows a Header section on a store's homepage. In the upper left, the section's Logo selector contains an uploaded image. The uploaded image is displayed as a custom logo inside the section (top center).

For general guidance with modifying sections, refer to Sections overview, and Shopify help: Sections and blocks

Set up the header section

To set up your store's header section:

  1. Go to Customize theme. At the top of the page, use the dropdown to select the Home page template.

    Note

    The header section is accessible from all page templates, excluding the Checkout, Password, and Gift card page templates.

  2. From the side menu, select Header.

    The header section selected in Theme editor.

  3. Select a section setting described in the following table.

Section setting nameDescription
Logo > LogoUse the following Logo selector options to set up an image to use as your store's primary logo, inside the section.
  • To add an image, choose Select image, and then upload an image or select an image file from your store's file library.
  • To add a focal point to an image, select Edit in the image selector's thumbnail preview area, and then select Add focal point. Refer to Shopify help: Add a focal point to an image, and Edit an image inside a section or block.
  • To add "alt text" to an image, select Edit, and then enter a brief description of the image into the Image alt text box. The description improves search engine optimization (SEO), and provides greater accessibility for customers who use screen-reading tools. The text is saved immediately. Refer to Shopify help: Adding alt text to media
  • To download an image, select Edit > Download.
  • To replace an image, choose Change > Change image, and then select or upload a new image.
  • To remove an image, select Change > Remove image.
  • To display an image from a dynamic source, select the Change > Connect dynamic source, and then choose a metafield to add. Refer to Shopify help: Metafields
For mobile displays, or "sticky-mode" header, etc., Configure a block within a header section.
Logo > Logo > Connect dynamic sourceTo display a logo image from a dynamic source, select the Connect dynamic source icon beside the Logo image selector, and then choose a metafield to add. Refer to Shopify help: Metafields
Logo > Logo maximum widthAdjust the slider Logo maximum width to set a maximum width size for the logo image inside the section between 2rem and 9rem (relative root elements).
Navigation > Main menuSet up a menu to display inside the section. Refer to Set a header menu.
Color scheme > Color schemeUse the Color scheme dropdown to set the section's color scheme to Primary, Secondary or Tertiary. Refer to Colors.
Sticky header > Sticky headerSelect the Sticky header checkbox to turn on/ off keeping the header (fixed) at the top of the page.
Sticky header > Transparent when stickySelect the Transparent when sticky checkbox to set the sticky header's background to transparent (on) or solid (off). To use this feature, enable the Sticky header setting.
Overlay header > Enable on home pageSelect the checkbox Enable on home page to turn on/ off positioning the header over the homepage, as an overlay.
Overlay header > Enable on collection templateSelect the checkbox Enable on collection template to turn on/ off positioning the header over collection pages, as an overlay.
Overlay header > Enable on default product templateSelect the checkbox Enable on default product template to turn on/ off positioning the header over the (default) product page, as an overlay.
Overlay header > Enable on classic product templateSelect the checkbox Enable on classic product template to turn on/ off positioning the header over the (classic) product page, as an overlay.
Overlay header > Enable on split product templateSelect the checkbox Enable on classic product template to turn on/ off positioning the header over the (split) product page, as an overlay.
Overlay header > Overlay header colorSelect the Overlay header color dropdown to set a background color for the header overlay. The color options are Primary, Secondary, Tertiary (color schemes), White, and Black. To use this feature, enable the Header overlay.
Overlay header > Overlay logoUse the following Overlay logo image selector options to set up an image to use as a logo inside the section, when the header overlays a page.
  • To add an image, choose Select image, and then upload an image or select an image file from your store's file library.
  • To add a focal point to an image, select Edit in the image selector's thumbnail preview area, and then select Add focal point. Refer to Shopify help: Add a focal point to an image, and Edit an image inside a section or block.
  • To add "alt text" to an image, select Edit, and then enter a brief description of the image into the Image alt text box. The description improves search engine optimization (SEO), and provides greater accessibility for customers who use screen-reading tools. The text is saved immediately. Refer to Shopify help: Adding alt text to media
  • To download an image, select Edit > Download.
  • To replace an image, choose Change > Change image, and then select or upload a new image.
  • To remove an image, select Change > Remove image.
  • To display an image from a dynamic source, select the Change > Connect dynamic source, and then choose a metafield to add. Refer to Shopify help: Metafields
Overlay header > Overlay logo > Connect dynamic sourceTo display a overlay logo image from a dynamic source, select the Connect dynamic source icon beside the Overlay logo image selector, and then choose a metafield to add. Refer to Shopify help: Metafields
Layout and items > Mobile layoutFor mobile devices, use the Mobile layout dropdown to select a position for the logo and menu items inside the section. The dropdown options are:
  • Menu on the left, centered logo
  • Menu and logo on the left
  • Logo on the left, menu on the right
Layout and items > Desktop layoutFor desktop devices, use the Desktop layout dropdown to select a position for the logo and menu items inside the section. The dropdown options are:
  • Menu on the left, centered logo
  • Menu and logo on the left
  • Logo on the left, menu on the right
Layout and items > Use mobile menu on desktopSelect the checkbox Use mobile menu on desktop to turn on/off the mobile sidebar menu for desktop devices. With this setting enabled, make adjustments by using the Mobile sidebar's section settings.
Layout and items > Show searchSelect the Show search checkbox to show/ hide the search feature inside the section.
Layout and items > Display menu items asSelect the radio buttons Display menu items as to display menu items (like cart and search) inside the section as Icons or Text.
Layout and items > Section paddingSelect the Section padding radio buttons to set a size for the space displayed around elements (padding) inside the section to Small or Large. Refer to W3 Schools: CSS Padding
Featured links > Showcase second-level linksUse the dropdown Showcase second level links to show/ hide second level links inside the section's Featured links area. This setting also applies a Grid or Scroll style for displaying second level links inside the section. With this setting enabled, the section displays second level links to products or collections. The section showcases products or collections if they don't have child links.
Featured links > Collection image cropUse the dropdown Collection image crop to set an image cropping style for collection images inside the section's Featured links area. The options are: No crop, Portrait, Square, and Landscape. To use this feature, set the option Showcase second-level links to Grid or Scroll.
Theme settingsSelect Theme settings to access additional settings for the section. Refer to Section theme settings menu.

Set a header menu

To select a menu to display inside the header section, apply the following settings in Header > Navigation > Main menu.

  • To edit the current menu, select the menu link. The link opens the Navigation menu editor in Shopify admin. Use the editor to modify the menu. Refer to Shopify help: Add, remove, or edit menu items in your online store

  • To create a new menu, select Change > Change menu, and then follow the Create menu link. The link opens the Navigation > Add menu page in Shopify admin. Use the menu editor to create a new menu, and then the select the new menu. Refer to Shopify help: Add, remove, or edit menu items in your online store

    The header menu options in Theme editor.

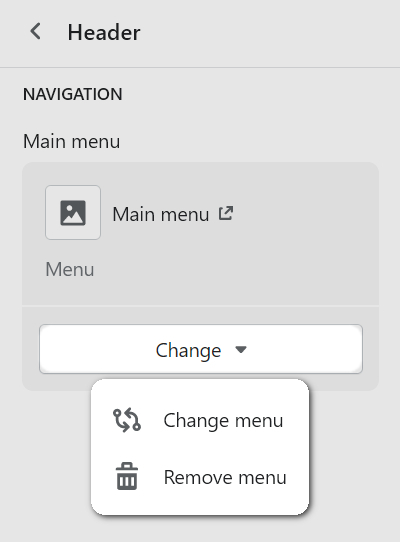
  • To replace the current menu, select Change > Change menu. Enter the name of the replacement menu into the Search box, or pick a replacement menu from the list, and then choose Select.

  • To delete the current menu, select Change > Remove menu.

Configure a block within a header section

A header section can contain four (logo) blocks. The blocks are: Logo for Sticky header, Logo for mobile, Logo - fine adjust, and Logo - advanced.

To configure a block inside the section:

  1. Go to Customize theme. At the top of the page, use the dropdown to select the Home page template.

  2. From the side menu, expand the Header section menu.

  3. To configure an existing block, select the block from the side menu.

    To add a new block, select Add block, and then select the block you added.

    The add block menu in Theme editor.

    Note

    Inside the header section, you can add, remove, or show/ hide blocks. Refer to Configure blocks inside a section, or Shopify help: Sections and blocks

  4. Apply a block setting described in the Table: Header-blocks.

Table: Header blocks

The following table describes the blocks inside the header section, and their corresponding settings.

To configure a block, refer to Configure a block within a header section.

Block nameBlock descriptionBlock setting(s)
Logo for Sticky headerSet up a block with a logo image, for the section's "sticky header" area. To use this feature, enable the section's Sticky header option.
  • Use the following Logo selector options to set up an image to use as a logo for the "sticky header" area, inside the block.
    • To add an image, choose Select image, and then upload an image or select an image file from your store's file library.
    • To replace an image, choose Change > Change image, and then select or upload a new image.
    • To remove an image, select Change > Remove image.
    • Select the Add alt text link, and then enter a brief description of the image into the Image alt text box. Refer to Shopify help: Adding alt text to media
    • To display an image from a dynamic source, select Change > Connect dynamic source, and then choose a metafield to add. Refer to Shopify help: Metafields

  • To display a logo image from a dynamic source, select the Connect dynamic source icon beside the Logo image selector, and then choose a metafield to add. Refer to Shopify help: Metafields

  • Adjust the slider Logo maximum width to set a maximum width size for the logo image inside the block between 2 and 9.

  • Select Remove block to delete the block from the current section.
Logo for mobileSet up a block with a logo image to display on mobile devices, inside the section
  • Use the following Mobile logo image selector options to set up an image to display on mobile devices, inside the block.
    • To add an image, choose Select image, and then upload an image or select an image file from your store's file library.
    • To replace an image, choose Change > Change image, and then select or upload a new image.
    • To remove an image, select Change > Remove image.
    • Select the Add alt text link, and then enter a brief description of the image into the Image alt text box. Refer to Shopify help: Adding alt text to media
    • To display an image from a dynamic source, select Change > Connect dynamic source, and then choose a metafield to add. Refer to Shopify help: Metafields

  • To display a logo image from a dynamic source, select the Connect dynamic source icon beside the Mobile logo image selector, and then choose a metafield to add. Refer to Shopify help: Metafields

  • Adjust the slider Logo maximum width to set a maximum width size for the logo image inside the block between 0.5 and 4.

  • Use the following Logo when header is overlaid image selector options to set up an image to display on mobile devices, inside the block. The logo is shown when the header is displayed as an overlay.
    • To add an image, choose Select image, and then upload an image or select an image file from your store's file library.
    • To replace an image, choose Change > Change image, and then select or upload a new image.
    • To remove an image, select Change > Remove image.
    • Select the Add alt text link, and then enter a brief description of the image into the Image alt text box. Refer to Shopify help: Adding alt text to media
    • To display an image from a dynamic source, select Change > Connect dynamic source, and then choose a metafield to add. Refer to Shopify help: Metafields

  • To display a logo image from a dynamic source, select the Connect dynamic source icon beside the image selector Logo when header is overlaid, and then choose a metafield to add. Refer to Shopify help: Metafields

  • Use the following image selector options in Logo for sticky header on mobile > Sticky mobile logo to set up an image to display on mobile devices, inside the block. The logo is displayed in the "sticky header" area.
    • To add an image, choose Select image, and then upload an image or select an image file from your store's file library.
    • To replace an image, choose Change > Change image, and then select or upload a new image.
    • To remove an image, select Change > Remove image.
    • Select the Add alt text link, and then enter a brief description of the image into the Image alt text box. Refer to Shopify help: Adding alt text to media
    • To display an image from a dynamic source, select Change > Connect dynamic source, and then choose a metafield to add. Refer to Shopify help: Metafields

  • To display a logo image from a dynamic source, select the Connect dynamic source icon beside the image selector Logo for sticky header on mobile > Sticky mobile logo, and then choose a metafield to add. Refer to Shopify help: Metafields

  • Adjust the slider Logo for sticky header on mobile > Logo maximum width to set a maximum width size for the logo image inside the block between 0.5 and 4.

  • Adjust the slider Breakpoint > Logo breakpoint to set a screen width between 512 and 1024. When the width of the user's display device is less than this value, the block uses the mobile logo image. For display widths that exceed this value, the desktop logo image is used.

  • Select Remove block to delete the block from the current section.
Logo - fine adjustAdd a block to reposition the images inside the section's logo blocks.To reposition the images inside the section's logo blocks:
  • Adjust the Horizontal slider to reposition logo images to the left or right. The slider ranges from -0.5 (left) to 0.5 (right), and applies minor adjustments to the logo's position. This setting applies to logos on both desktop and mobile devices. To apply this setting to desktop devices only, set the checkbox option Apply different adjustments to on.

  • Adjust the Vertical slider to reposition logo images downwards or upwards. The slider ranges from -0.5 (down) to 0.5 (up), and applies minor adjustments to the logo's position. This setting applies to logos on both desktop and mobile devices. To apply this setting to desktop devices only, set the checkbox option Apply different adjustments to on.

  • Select the checkbox Mobile > Apply different adjustments on mobile to turn on/off using different Horizontal and Vertical position settings for header logos on desktop and mobile devices. To use this feature, add a mobile logo image block inside the section.

  • Adjust the slider Mobile > Horizontal to reposition the mobile logo image to the left or right. The slider ranges from -0.5 (left) to 0.5 (right), and applies minor adjustments to the logo's position. This setting applies to logos on mobile devices. The apply this setting, set the checkbox option Apply different adjustments to on.

  • Adjust the slider Mobile > Vertical slider to reposition the mobile logo image downwards or upwards. The slider ranges from -0.5 (down) to 0.5 (up), and applies minor adjustments to the logo's position. This setting applies to logos on mobile devices. The apply this setting, set the checkbox option Apply different adjustments to on.

  • Select Remove block to delete the block from the current section.
Logo - advancedAdd a block containing a text or HTML logo made from custom Liquid template language code. When this block is added, all other logo settings and blocks are ignored. Refer to Learning Liquid: A guide to Shopify theme development
  • In the Liquid box, enter Liquid template language code. The section displays the contents of this block inside <h1></h1> tags. All Header logo blocks use this code, unless you provide alternative Liquid code for each corresponding logo block/ area.

  • In the box Sticky header > Liquid for sticky header, enter Liquid template language code. The section displays the contents of this block inside the sticky header area.

  • In the box Mobile > Liquid for mobile, enter Liquid template language code. The section displays the contents of this block inside the header area, on mobile devices.

  • In the box Mobile > Liquid for sticky header on mobile, enter Liquid template language code. The section displays the contents of this block inside the sticky header area, on mobile devices.

  • Adjust the slider Mobile > Logo breakpoint to set a screen width between 512 and 1024. When the width of the user's display device is less than this value, the block uses Liquid code for the mobile logo. For display widths that exceed this value, the Liquid code for the desktop logo image is used.

  • Select Remove block to delete the block from the current section.