Appearance
Menu drawer
This guide describes setting up the Menu drawer section.
Use the section to add a drawer menu for navigating your store's pages on mobile display devices.
The previous video shows a store's Homepage. When the Header section's Menu is selected in the upper right, a Menu drawer section overlays the page.
For general guidance with modifying sections, refer to Sections overview, and Shopify help: Sections and blocks.
Set up a Menu drawer section
To set up a Menu drawer section:
Go to Customize theme.
At the top of the page, use the dropdown to select the Homepage template.
Note
The section is accessible from all page templates, excluding the Checkout, Password and Gift card pages. Theme editor displays the section in a page's Overlay area by default.
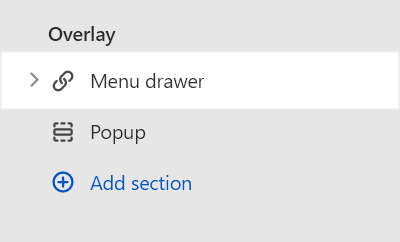
From the side menu, select Menu drawer.

Select a setting described in the following table.
| Setting name | Description |
|---|---|
| Show search | Select the Show search checkbox to show/hide the search field inside the section. |
| Language selector > Language settings (link) | To add a language to your store, follow the language settings link to the Store languages area of your store's Admin page. Refer to Shopify help: Localization and translation. |
| Language selector > Show language selector | For stores that support multiple languages, use the Show language selector checkbox to show/hide a language selector inside the section. The language selector allows visitors to switch between different language versions of your store. |
| Country/ region selector > Payment settings (link) | To add a country, region or currency to your store, follow the payment settings link to the Payments area of your store's Admin page. Refer to Shopify help: Payments. |
| Country/ region selector > Show country/ region selector | For stores that support multiple countries or regions, select the checkbox Show country/ region selector to show/hide a region selector inside the section. The region selector allows visitors to switch between your store's supported regions and currencies. |
| Layout > Drawer position | Select the Drawer position radio buttons to display the section on the Right or Left side of the page. |
| Vertical spacing between blocks | Adjust the slider Vertical spacing between blocks to resize the empty vertical space that's displayed around the blocks inside the section. The minimum slider value is 0px or pixels, and the maximum value is 2px. |
| Typography > Desktop font size scale | Adjust the slider Desktop font size scale to set a font size for the section's text on desktop display devices. The minimum value is -2 and the maximum is 4. Refer to Shopify help: Customize your font sizes. |
| Typography > Mobile font size scale | Adjust the slider Mobile font size scale to set a font size for the section's text on mobile display devices. The minimum value is -2 and the maximum is 2. Refer to Shopify help: Customize your font sizes. |
| Theme settings | Select Theme settings to access additional settings for the section. Refer to Section theme settings menu. |
| Custom CSS | Select Custom CSS. In the box, enter custom CSS styles to apply only to the current section. Refer to Shopify help: Add custom CSS. To apply custom styles to your entire online store, refer to Theme settings > Custom CSS. |
Configure a block within a Menu drawer section
A default Menu drawer section contains 1 menu block. To configure a block inside the section:
Go to Customize theme.
At the top of the page, use the dropdown to select the Homepage template.
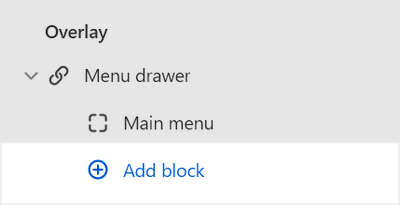
From the side menu, expand the Menu drawer section menu.
To configure an existing block, select the block from the side menu.
To add a new block, select Add block, choose a block to add, and then select the block you added.

Note
Inside the section, you can add, remove, show/ hide, or move blocks. Refer to Configure blocks inside a section, and Shopify help: Sections and blocks.
Apply a block setting described in the Table: Menu drawer block.
Table: Menu drawer blocks
The following table describes the blocks inside the Menu drawer section, and their corresponding settings.
The blocks indicated with an asterisk * are contained in a default Product section. To configure a block, refer to Configure a block within a Menu drawer section.
| Block name | Block description | Block setting(s) |
|---|---|---|
Menu * | Display a navigation menu inside the section. |
|
| Rich text | Display an area containing formatted text inside the section. |
|
| Button | Display a (linked) button inside the section. |
|
| Social media | Display links to your store's social media inside the section. |
|
Set up a Menu drawer's menu block
To set up a menu inside a menu block, apply the following settings in Menu drawer > Menu (block).
If the block has no menu, to select a menu, choose Select menu. Enter the name of a menu into the Search box, or pick a menu from the list, and then choose Select.
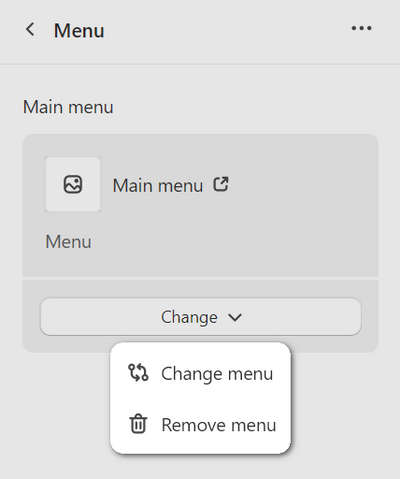
To edit the current menu, select the Menu link. The link opens the Navigation menu editor in Shopify admin. Use the editor to modify the menu. Refer to Shopify help: Add, remove, or edit menu items in your online store.
To create a new menu, select Change > Change menu, and then follow the Create menu link. The link opens the Navigation > Add menu page in Shopify admin. Use the menu editor to create a new menu, and then the select the new menu. Refer to Shopify help: Add, remove, or edit menu items in your online store.

To replace the current menu, select Change > Change menu. Enter the name of the replacement menu into the Search box, or pick a replacement menu from the list, and then choose Select.
To delete the current menu, select Change > Remove menu.