Appearance
Add comparative scales to product pages
This guide describes how to set up a Comparative scale (block) on your store's product pages.

The previous image shows a store page with a Featured product section, on the right. Below the product's Price, the section contains a Comparative scale block. On the left, the block's Marker position slider is set at 33%. This value is applied to the scale's marker position on the right. The marker position illustrates the relationship between the product's Sweet and Salty features.
Use a comparative scale to compare two variables. For example, in the following image, the Comparison scale shows that the product is more Salty than Sweet.

Add a comparative scale block
You can add a Comparative scale block into the following product sections:
To add a Comparative scale block inside a product section:
Go to Customize theme.
In Theme editor, at the top of the page, use the dropdown to select a template that contains a Featured product or Product section.
Note
To add a section, select Add section, choose Featured product or Product, and then select the section you added.
The Product section is available only on Default product, and Preorder pages. A Featured product section can be added into any page, except Checkout and Giftcard pages. Refer to Shopify help: Add a section.
From the side menu, expand the section's settings menu.
To configure an existing block, select a Comparative scale block.
To add a new block, select Add block, choose Comparative scale, and then select the block you added.

Apply a block setting described in the following table.
| Block setting name | Description |
|---|---|
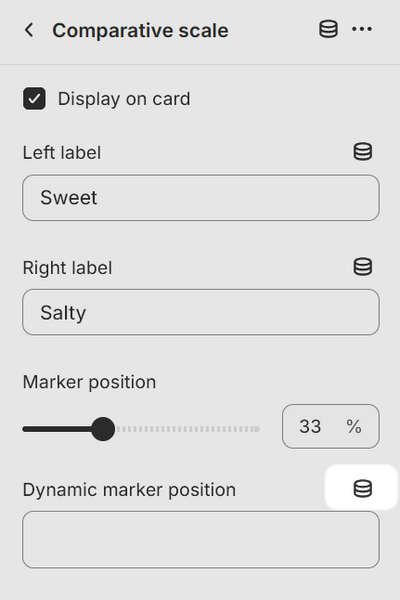
| Display on card | Select the checkbox Display on card to show/ hide a card behind the block. Adjacent blocks set to Display on card are merged into a single card. Refer to Shopify help: Cards. |
| Left label | In the Left label text box, enter text to display as label text for the left side of the scale. |
| Left label > Insert dynamic source | Select the icon Connect dynamic source to choose a metafield to use as the source for the label text on the left side of the scale. Refer to Shopify help: Metafields |
| Right label | In the Right label text box, enter text to display as label text for the right side of the scale. |
| Right label > Insert dynamic source | Select the icon Connect dynamic source to choose a metafield to use as the source for the label text on the right side of the scale. Refer to Shopify help: Metafields. |
| Marker position | Adjust the slider Marker position to set a value between 1 and 100 % (percent). The value applies to the scale's marker position inside the block. If the marker position slider is set to 1%, the scale's marker displays on the left side. If the marker position slider is set to 100%, the scale's marker displays on the right side. |
| Dynamic marker position | In the text box Dynamic marker position, enter a metafield (key) name to use as the source for the block's value. The value applies to the scale's marker position inside the block. Adding a dynamic source overrides the Marker position slider. Refer to Add dynamic sources to comparative scales. |
| Dynamic marker position > Insert dynamic source | Select the icon Connect dynamic source to choose a metafield to use as the source for the block's value. The value applies to the scale's marker position inside the block. Adding a dynamic source overrides the Marker position slider. Refer to Add dynamic sources to comparative scales. |
| Remove block | Select Remove block to delete the block from the section. |
Add dynamic sources to comparative scales
By default, you set the value for a Comparative scale block using the Marker position slider. The value sets the position of the scale's marker, inside the block. If you've many products with different values, the values can be set by using dynamic sources with product metafields.
Comparative scale blocks include the option to add values from a dynamic source. Adding a dynamic source overrides any value set by the Marker position slider.
To set up a new dynamic source, refer to Create metafields for scales and Shopify help: Metafields.
To add a dynamic source to a Comparative scale block:
Go to Customize theme.
In Theme editor, at the top of the page, use the dropdown to select a template that contains a Featured product or Product section.
Note
To add a section, select Add section, choose Featured product or Product, and then select the section you added.
The Product section is available only on Default product, and Preorder pages. A Featured product section can be added into any page, except Checkout and Giftcard pages. Refer to Shopify help: Add a section.
From the side menu, expand the section's settings menu.
In the section's settings menu, select a Comparative scale block.
In the block settings menu, above the Dynamic marker position text box, select the icon to Connect dynamic source.
From the Connect dynamic source menu, choose a metafield.
For example, in the following image, the Connect dynamic source menu lists the metafields for a Comparative scale block inside a Featured product section.
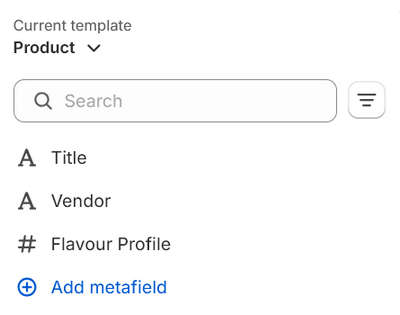
To set up a new dynamic source, select Add metafield. Refer to Create metafields for scales and Shopify help: Metafields.
Select Save from the Unsaved changes menu at the top of the page.
Create metafields for scales
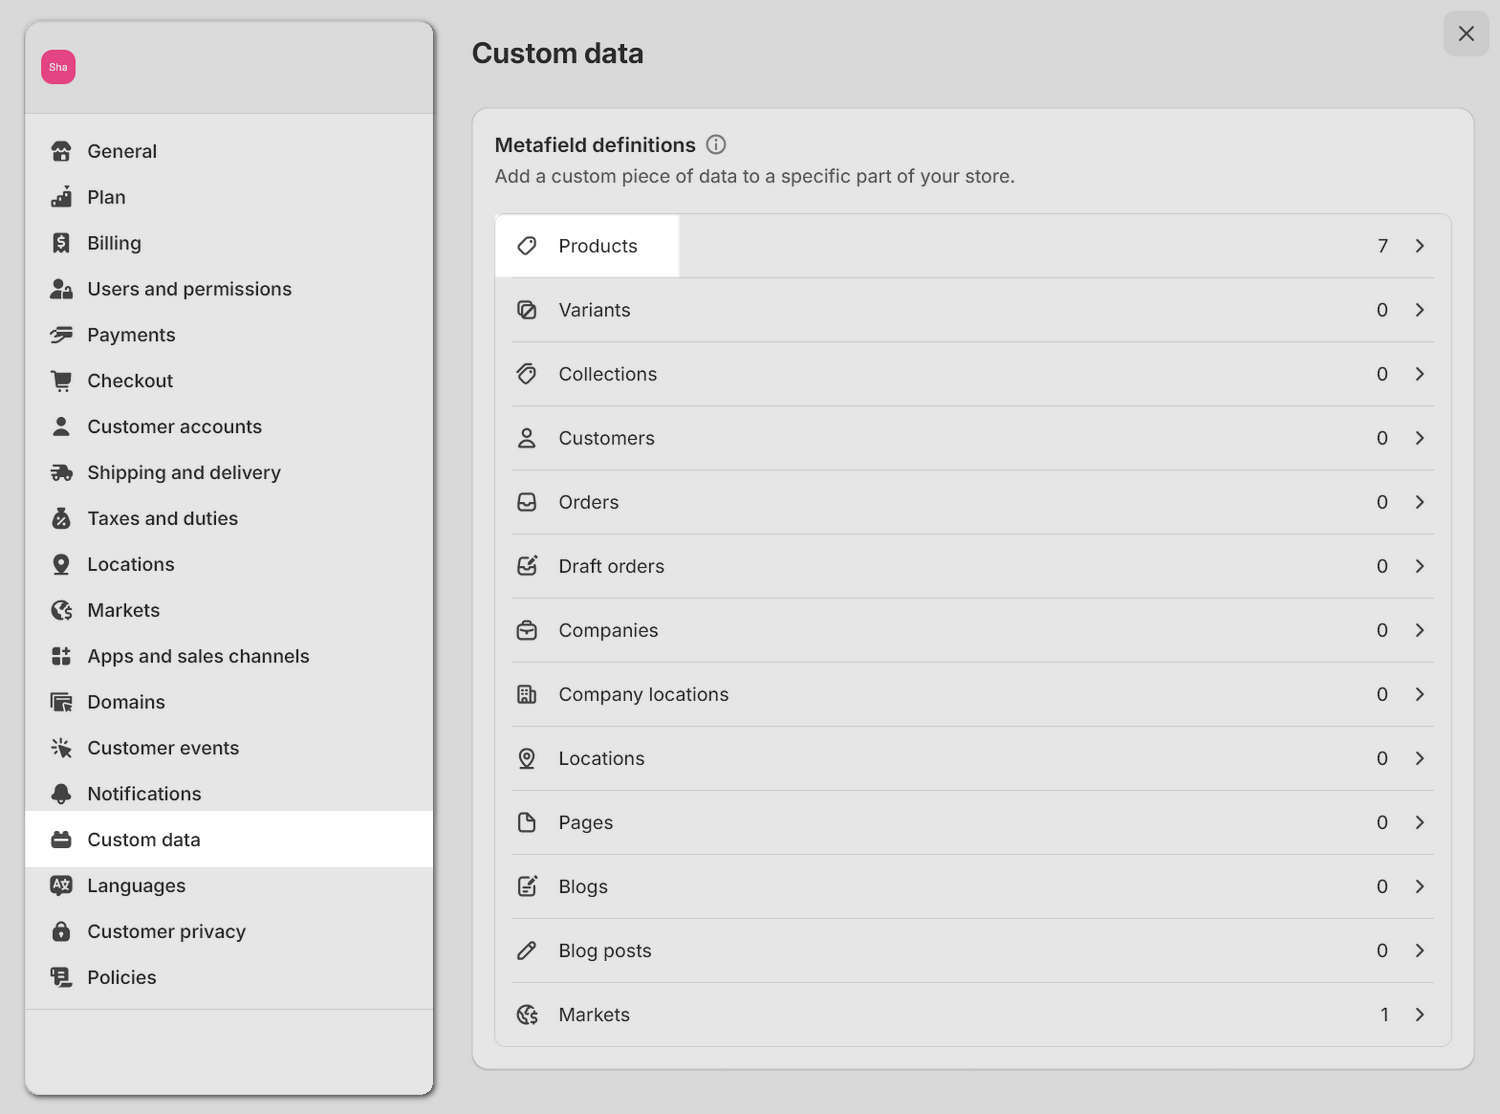
In your store's Shopify admin, select Settings > Custom data > Products.
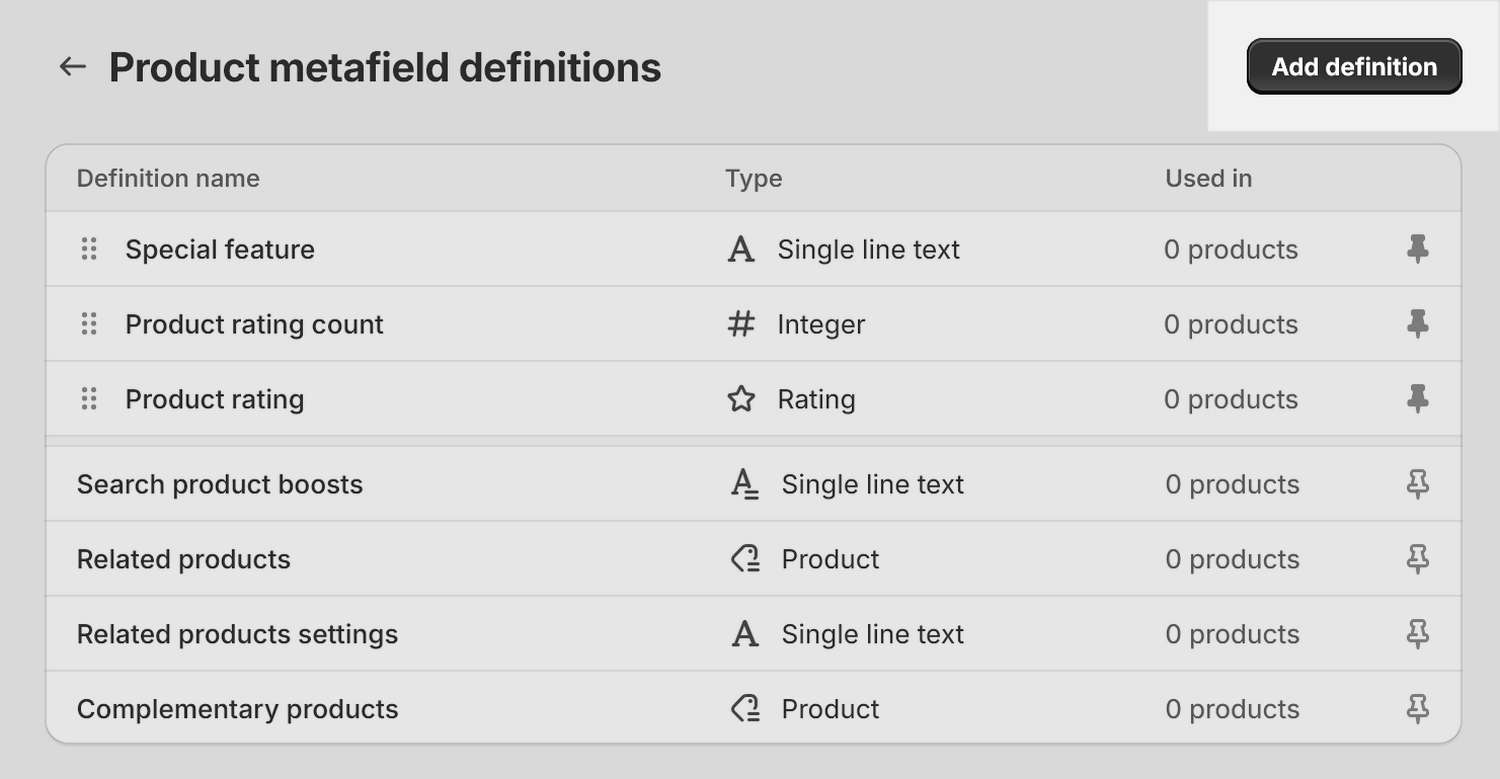
On the Product metafield definitions page, select Add definition.
In the Name text box, enter a name for the metafield. For example, in the Name text box, enter Flavor-profile.
In the Namespace and key text box, enter
shapes_themeas the namespace prefix.In the following example, the Namespace and key box contains the text
shapes_theme.flavor-profile.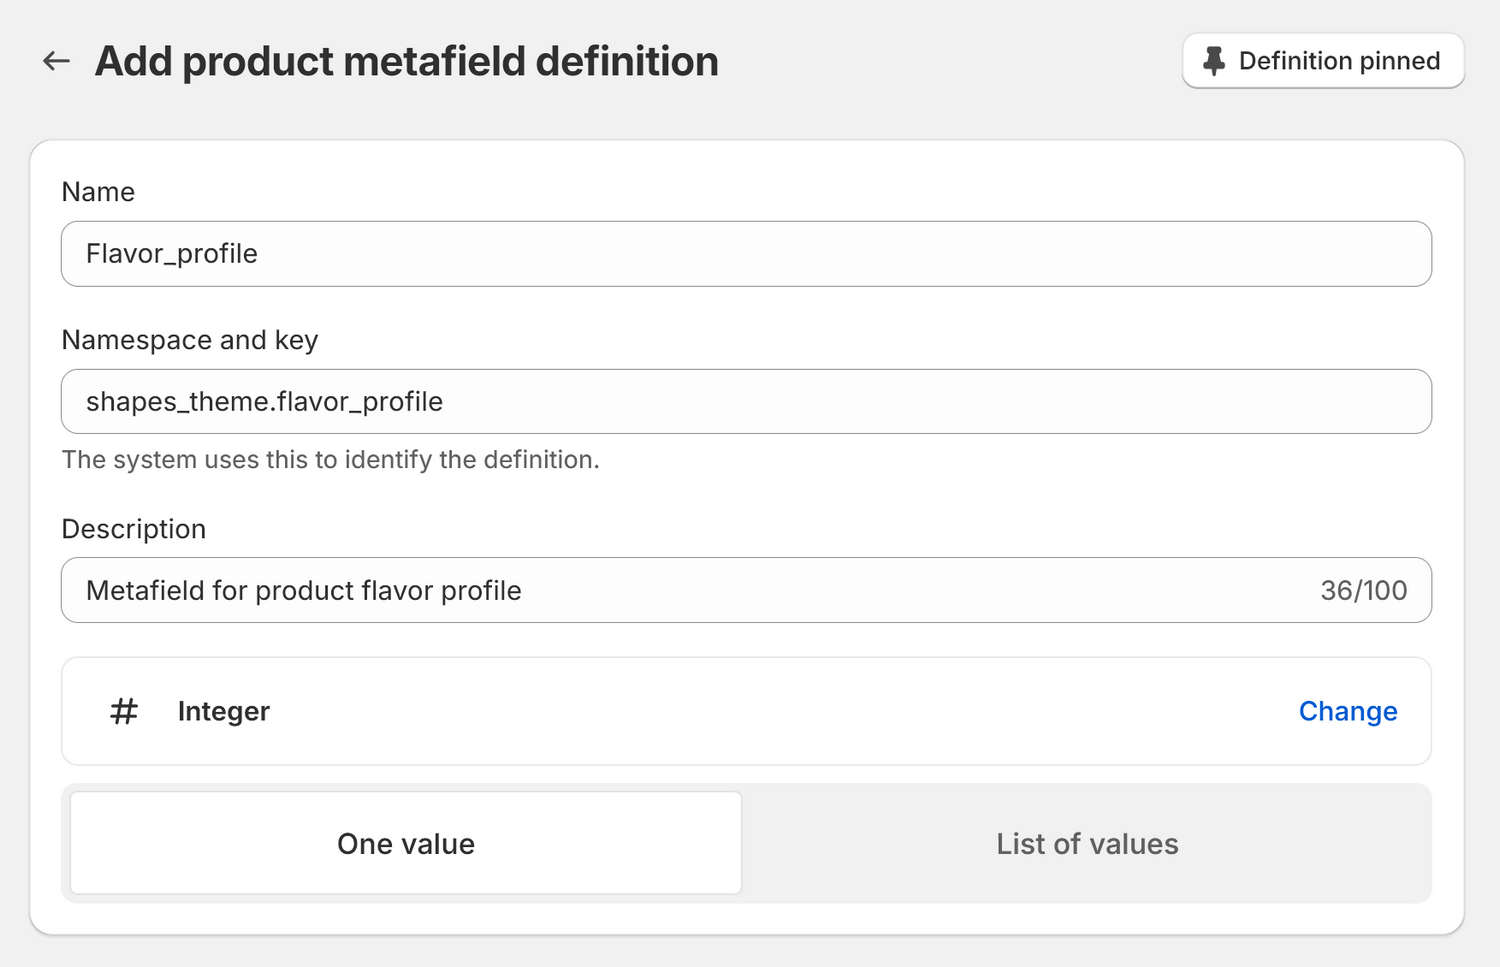
[Optional] In the Description text box, enter text to describe the metafield. For example, enter Metafield for product flavor profile.
Expand the Select content type list, and then select Integer.
Select Save from the Unsaved changes menu at the top of the page.
Set values for a product metafield
To set values for a product metafield:
In your Shopify admin, select Products, and then select a product from the product list.
At the bottom of the page, locate the Metafields area.
Select a metafield from the list, and then enter the required value.
For example, select the Flavor-profile metafield, and then enter the value
33into the text box. Enter a whole number, without the percentage symbol%.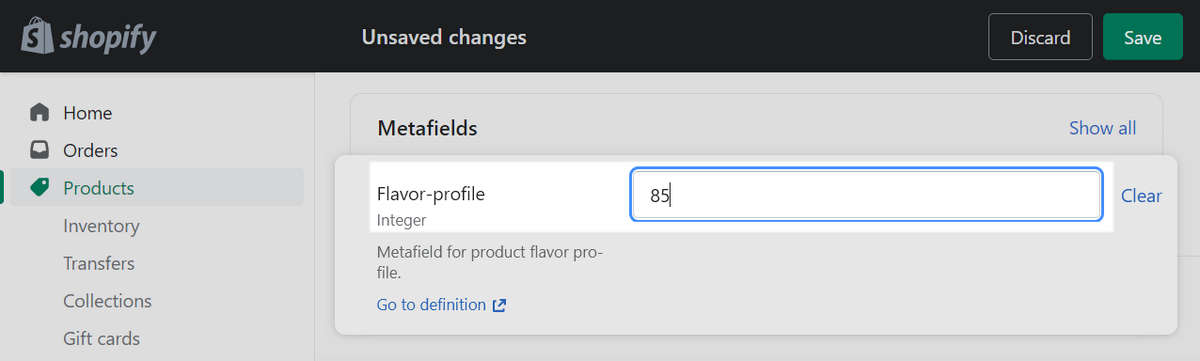
Select Save.
Add the metafield as a dynamic source into a Comparative scale block. Refer to Add dynamic sources to comparative scales.