

Appearance
Hero logo
This guide describes how to set up the Hero logo section.
Use the section to display a custom logo on your store's pages by using an image file from Shopify's free library or your store's media library.
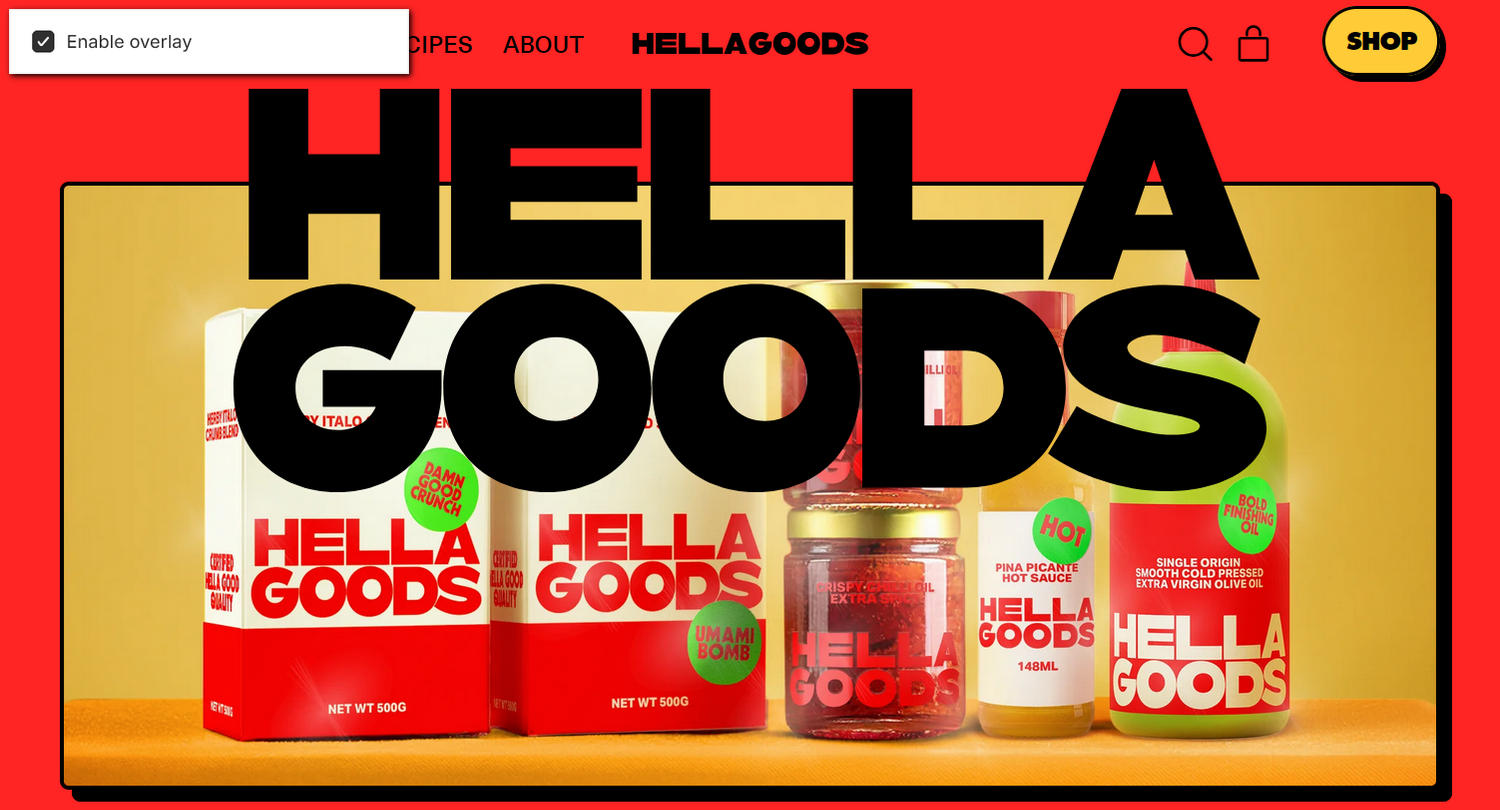
The previous image shows an example store's home page. In the upper left, part of the Theme editor's Hero logo section menu is displayed. The menu's Enable overlay option is enabled. This option turns on or off overlay mode for the section. Enabling this setting overlays a page's first section with the Hero logo section. For example, in the previous image, the Hero logo section's Hella Goods image overlays the section below it.
For general guidance with modifying sections, refer to Sections overview and Shopify help: Sections and blocks.
Configure the Hero logo section
To configure your Hero logo section:
In the Theme editor, at the top of the page, use the dropdown to select Home page.
Note
The section can be added into the Header and Footer areas of any page, excluding the Checkout, Gift card, and Password pages.
To add the section to the current page, in the Header or Footer area, select Add section > Hero logo. Refer to Shopify help: Add a section.
From the side menu, select Hero logo.
Select a setting described in the following table.
| Setting name | Description |
|---|---|
| Home page only | Use the Home page only option to turn on or off displaying the section on the home page only. |
| Plain text > Mobile font size scale | Adjust the Mobile font size scale slider between -2 and 7. Use this option to set a font size for the section's text on mobile display devices. |
| Plain text > Desktop font size scale | Adjust the Desktop font size scale slider between -2 and 10. Use this option to set a font size for the section's text on desktop display devices. |
| Logo > Logo image | Use the Logo image picker to select an image to display as a custom logo in the section. |
| Layout > Alignment | Use the Alignment options to select Left, Center or Right to specify a position for the section's content. |
| Layout > Logo max width | Adjust the Logo max width slider between 10 and 100 percent to set a maximum width for logos in the section. |
| Layout > Disable vertical spacing | Use the Disable vertical spacing option to show or hide an area of empty (white) spacing at the top of the section. |
| Overlay > Enable overlay | Use the Enable overlay option to turn on or off overlay mode for the section. Enabling this setting overlays a page's first section with the Hero logo section. |
| Overlay > Overlay offset | Adjust the Overlay offset slider between 0 and 500 pixels to specify a size for the section's overlay area. To use this option, turn on the Enable overlay option. |
| Color > Color scheme | Use the Color scheme picker to select a color scheme for the section. Refer to Colors. |
| Color > Use gradient for background | Use the Use gradient for background option to turn on or off using a gradient as the section's background. |
| Theme settings | If available, select Theme settings to access additional settings for the section. Refer to Section theme settings menu. |
| Custom CSS | Select Custom CSS. In the CSS field, enter custom CSS styles to apply only to the current section. Refer to Shopify help: Add custom CSS. To apply custom styles to your entire online store, refer to Theme settings > Custom CSS. |
| Remove section | Select Remove section to delete the section from the current page. |