

Appearance
Create product filters using metafields
This guide describes how to create product filters by using custom product metafields.
Note
For more information about creating filters, refer to Shopify help: Adding filters with Shopify Search & Discovery.
On collection pages, Shopify supports product option filters that allow store visitors to display a subset of products by using filtering criteria, such as availability and price. Product option filters use the values you specify for each corresponding product option in your Shopify admin. For example, a "Color" product option filter might have "Red" and "Blue" values.
You can also define custom product metafields to specify options to use with product filters.
Note
As an example, this guide describes creating an "Origin" product metafield filter that allows store visitors to filter from a specific country of origin. Creating this "Origin" filter involves:
- Defining a custom origin product metafield.
- Adding values to the origin metafield.
- Installing the Shopify Search & Discovery app.
- Using the origin metafield to display "Origin" as a product filter option on the default collection page.
To create different types of product filters using metafields, adapt the steps in this guide to suit your requirements. For more information about different types of product filters that support product metafields, refer to Shopify help: Filter types.
Define your custom product metafield
To define your custom product metafield:
In your Shopify admin, select Settings > Metafields and metaobjects > Products.
On the Product metafield definitions page, select Add definition, and then add the following information:
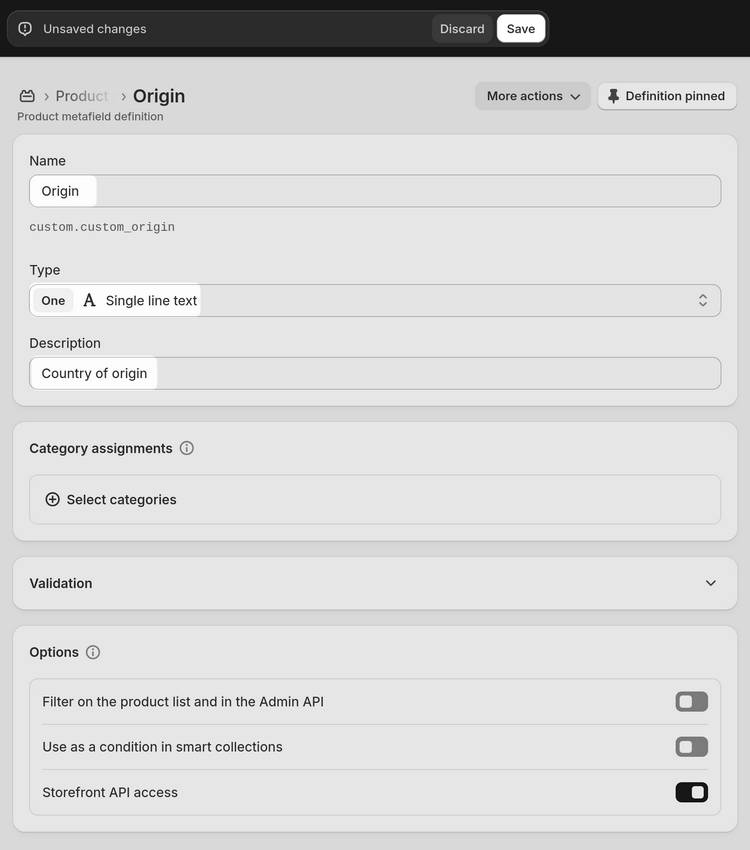
In the Name field, enter a name for the metafield. For example, to create an origin metafield, enter origin.
Below the Name field, note the auto-filled namespace and key. For example, for the origin metafield, note the
custom.originauto-filled namespace and key. You will reuse these later in the Theme editor. Alternatively, to provide a custom namespace and key, select the auto-filled element, and then enter your required namespace and key into the Namespace and key field.Set the Type option to One value or List of values to suit the data your metafield will store. For example, select One value to set the origin metafield to store a single line of text. Alternatively, to store multiple values per metafield instance, select List of values.
Choose Select type, and then choose the content type for your metafield from the list. For example, to set the origin metafield to store simple text, select Single line text.
Optional: Configure the Description, Category assignments, Validation, and Options settings. For information about configuring these settings, refer to Shopify help: Metafields.
Confirm that your completed metafield is defined correctly.
As an example, the following image shows a completed origin metafield definition configured to accept a single line of text per metafield instance.
Select Save, at the top of the page, to save your custom metafield definition.
Add values to your custom product metafield
To add values to your custom product metafield:
In your Shopify admin, select Products, and then choose a product to open the Product editor.
Locate the Product metafields area.
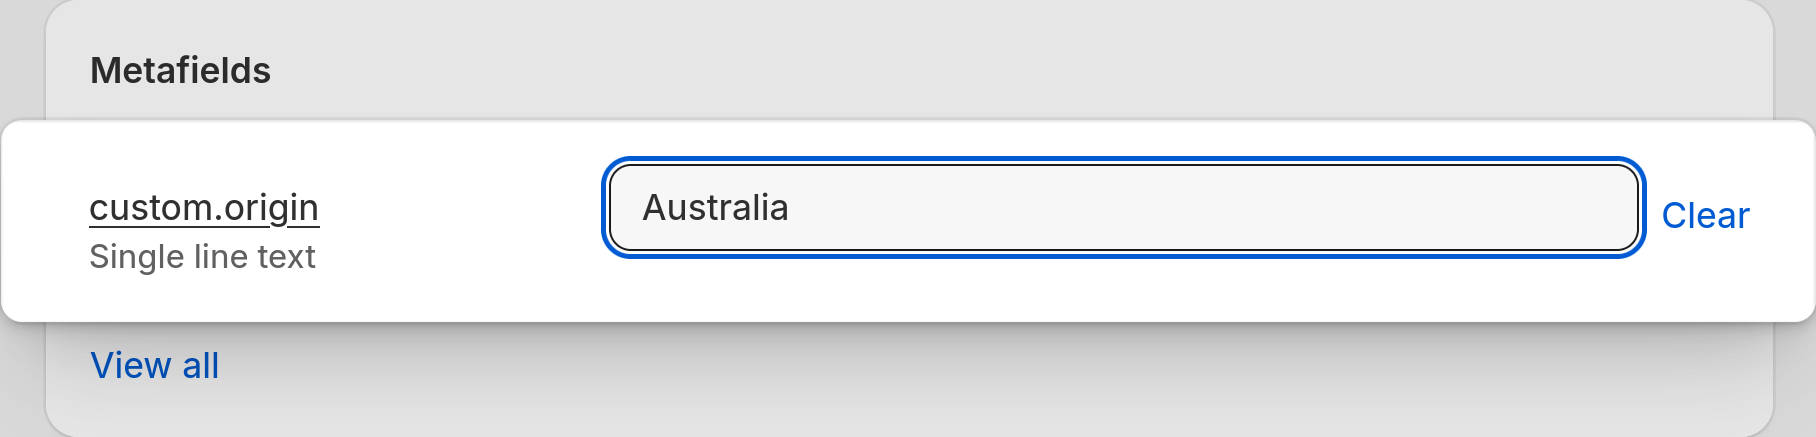
Select the metafield you defined previously, and then enter the required values into the corresponding field.
For example, select the origin metafield, and then enter the value Australia.
Optional: Repeat the previous steps to add metafield values to other products.
Select Save to save the values you added to the metafield.
Install the Shopify Search & Discovery app
Your store must have the Shopify Search & Discovery app installed.
To install the Shopify Search & Discovery app:
In your browser, go to the Shopify Search & Discovery app page on Shopify's App Store:
https://apps.shopify.com/search-and-discovery.Select Install, and then accept the installation terms.
In your Shopify admin, select Apps > Search & Discovery > Filters.
Select Add filter, choose Select source, and then select the custom product metafield you created previously. For example, select custom.origin.
On the Add filter page, in the Filter label field, enter a display name for your custom filter option.
Note
The text you enter in the Filter label field is displayed as a label for the filter option on your store's collection page.
On the Add filter page, locate the Values area, and then enable the values you want to display as product filter options. For example, enable the Australia value.
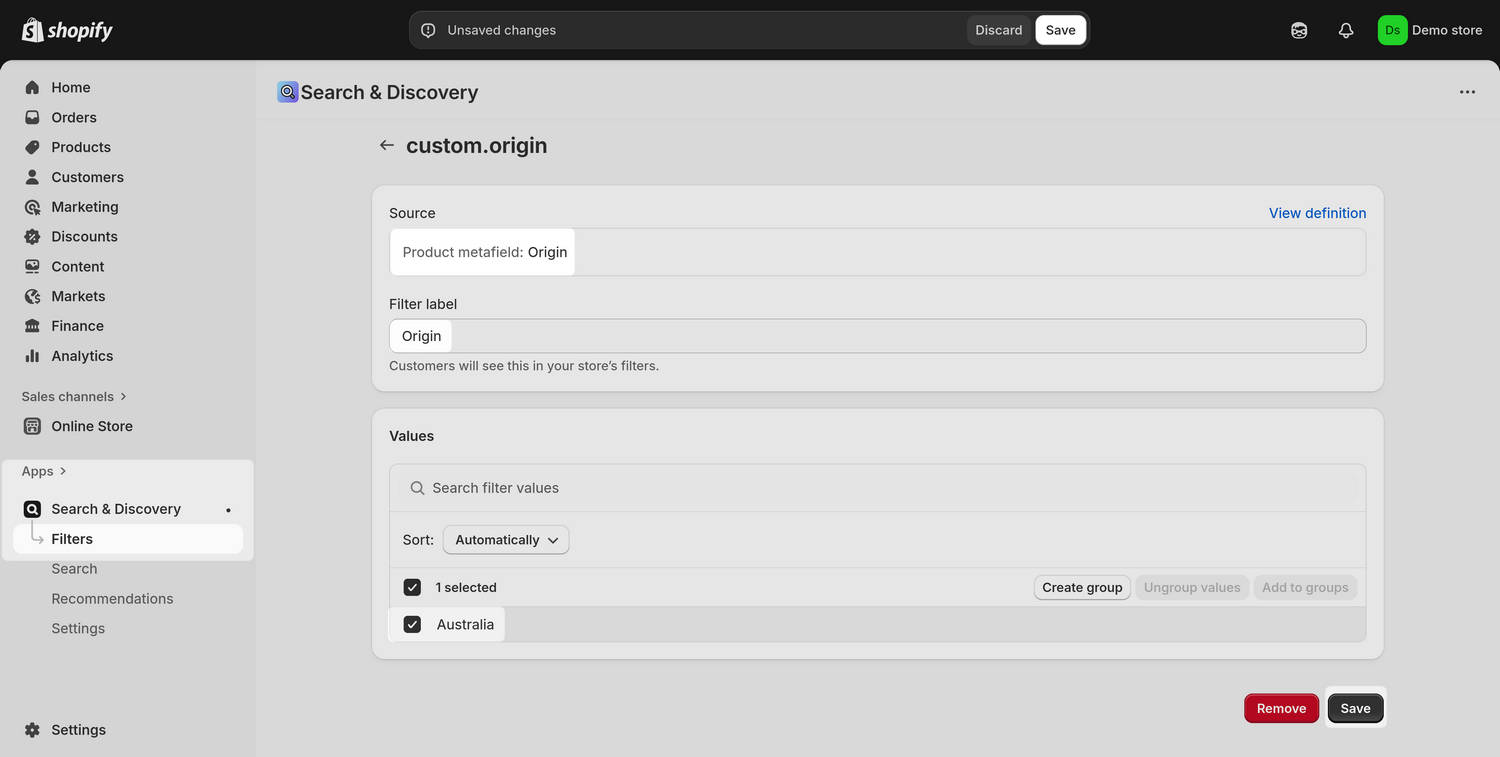
Select Save to save the changes you made to the Shopify Search & Discovery app's filter options.
Use your custom metafield to display a product filter option
To use your custom metafield to display a product filter option on a collection page:
Open your theme in the Theme editor.
In the Theme editor, use the dropdown at the top of the page to select a collection page with a section that supports filtering.
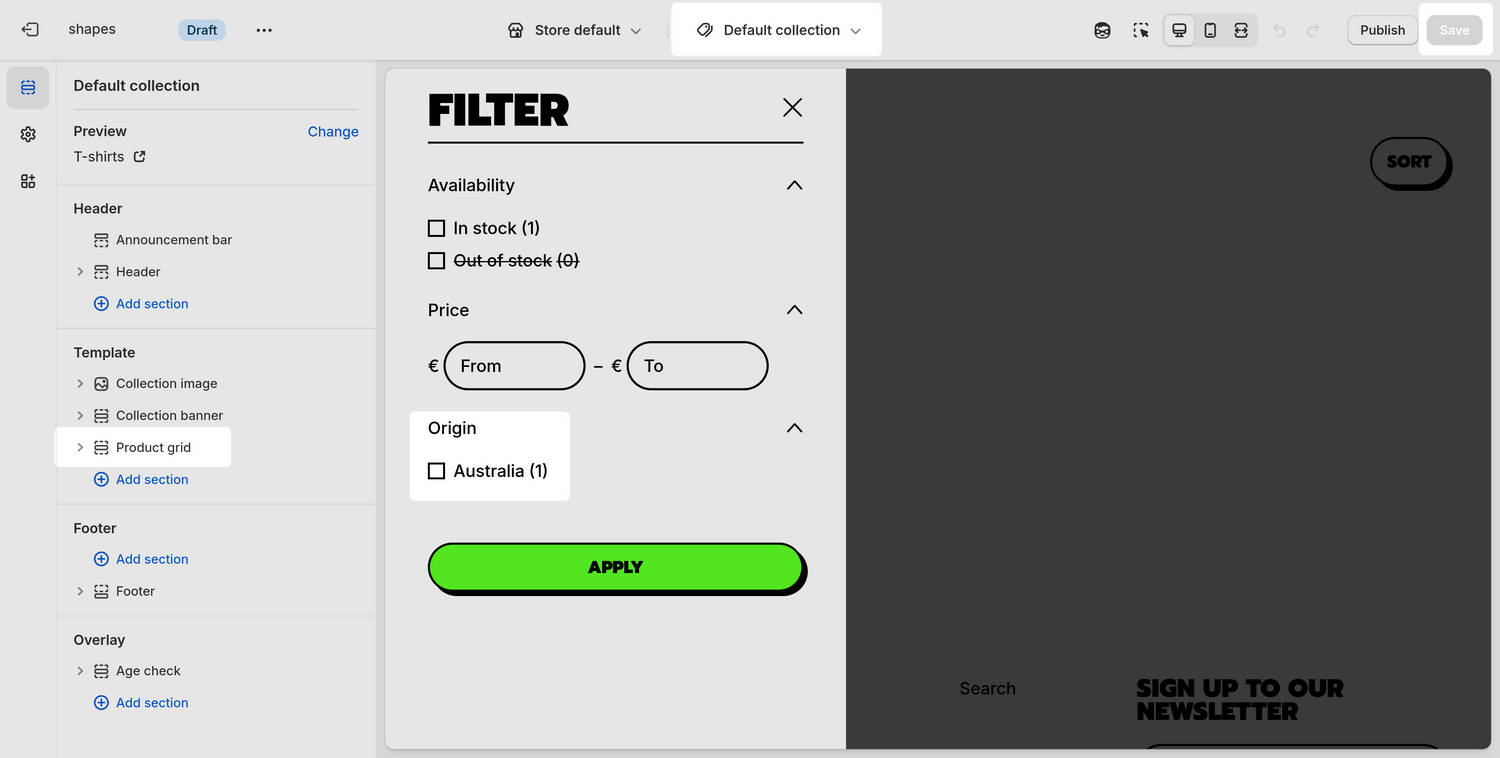
For example, select Collections > Default collection > Product grid.
Optional: At the top of the sidebar, select the Preview picker, and then choose a collection of products with values specified for your custom product metafield.
In the section settings menu, turn on the Enable filtering option.
Optional: In the Theme editor's sidebar, adjust the section's Sorting and filtering settings to suit your requirements.
Confirm that the Filter options include the values from your custom metafield.
For example, the following image shows a default collection page with the custom Origin product filter option.
Select Save to save the changes you made to the section's settings.