

Appearance
Add bar charts to product pages
This guide describes how to set up a Horizontal bar chart (block) on your store's product pages.
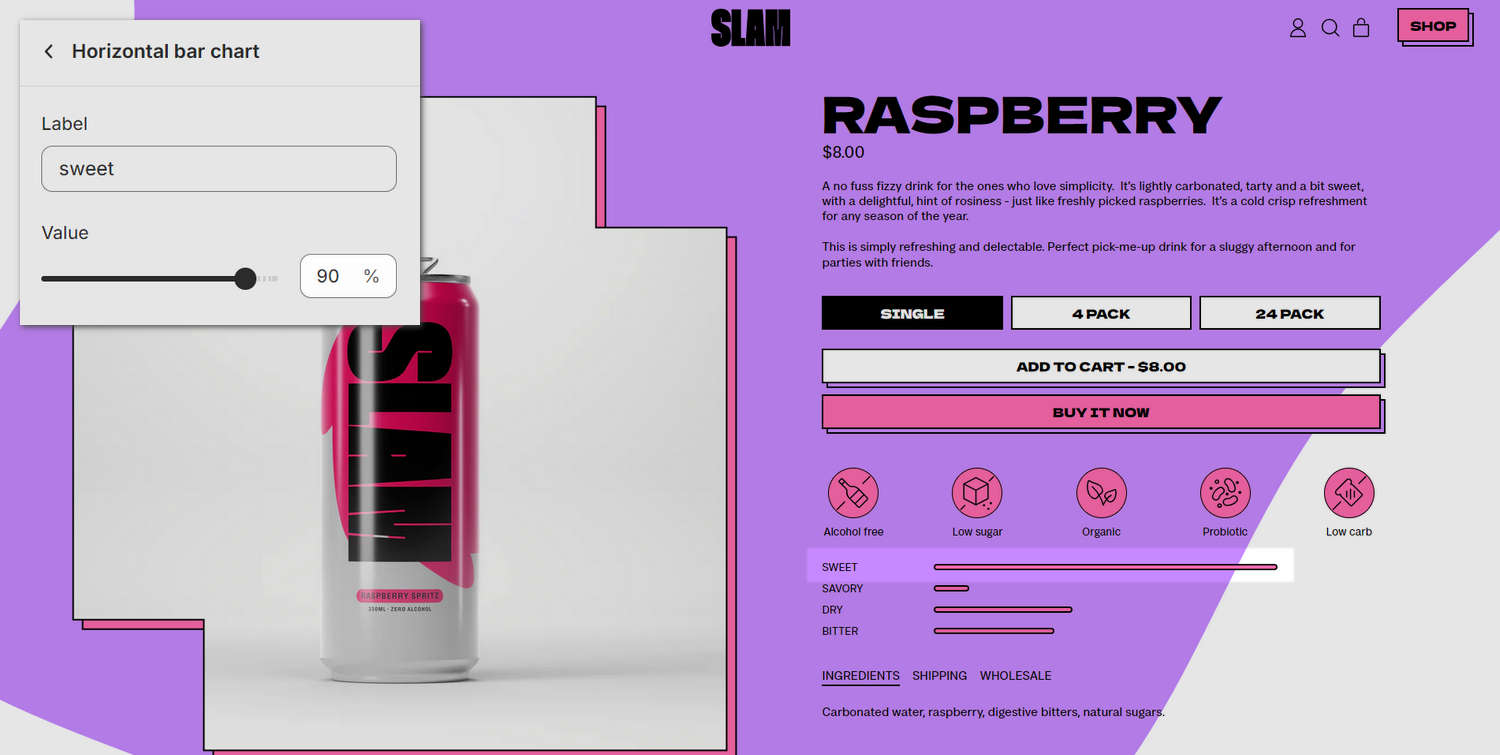
The previous image shows a Featured product section on a store page. In the upper left, part of the Theme editor's section settings menu is displayed. The menu's Value slider quantifies the Sweet feature at 90%. In the lower right, the section contains a Horizontal bar chart block. This 90% value is applied to the length of the chart's top bar to illustrate the strength of the product's Sweet feature.
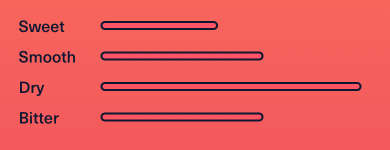
You can add a Horizontal bar chart block for each product feature. For example, in the following image, the section has four bar chart blocks. Each bar represents a specific product characteristic, with a value for Sweet, Savory, Dry, and Bitter.
Add a Horizontal bar chart block
You can add a Horizontal bar chart block to the Featured product and Product sections.
To add a Horizontal bar chart block to a supported product section:
In the Theme editor, at the top of the page, use the dropdown to select a template that contains a Featured product or Product section.
From the side menu, expand the section's settings menu.
To configure an existing block, select a Horizontal bar chart block.
To add a new block, select Add block, choose Horizontal bar chart, and then select the block you added.
Apply a block setting described in the following table.
| Block setting name | Description |
|---|---|
| Label > Label | In the Label field, enter text to display as the block's label. The label is applied to the bar in the bar chart. |
| Label > Uppercase | Use the Uppercase option to turn on or off uppercase text for the block's label. |
| Value > Value | Adjust the Value slider to set a value for the block between 1 and 100. The value is applied to the length of the bar in the bar chart. Setting the value to 100 displays the bar at full length. |
| Value > Dynamic value | In the Dynamic value field, enter a metafield key name to use as the source for the block's value. Adding a dynamic value source overrides the Value slider. Refer to Add dynamic sources to bar charts. |
| Card > Display on card | Use the Display on card option to show or hide a card behind the block. Adjacent blocks set to Display on card are merged into a single card. Refer to Shopify help: Cards. |
| Remove block | Select Remove block to delete the block from the section. |
Note
To connect a metafield to a setting that supports metafields, select the Connect dynamic source icon displayed beside the setting in the Theme editor.
To learn how to connect a metafield to a supported setting, refer to Shopify help: Connecting metafields to your theme by using the Theme editor.
Add dynamic sources to bar charts
By default, you set the value for a Horizontal bar chart block using the block's Value slider. The value is applied to the length of the bar in the bar chart. If your store has many products with different values, the values can be set by using dynamic sources with product metafields.
Horizontal bar chart blocks include the option to add values from a dynamic source. Adding a dynamic source overrides any value set by the Value slider.
To set up a new dynamic source, refer to Create metafields for bar charts and Shopify help: Metafields.
To add a dynamic source to a Horizontal bar chart block:
In the Theme editor, open a section that contains a Horizontal bar chart block.
In the block's settings menu, beside the Dynamic value field, select the Connect dynamic source icon, and then choose a metafield.
For example, the following image shows the available product metafields for a Horizontal bar chart block in a Featured product section.
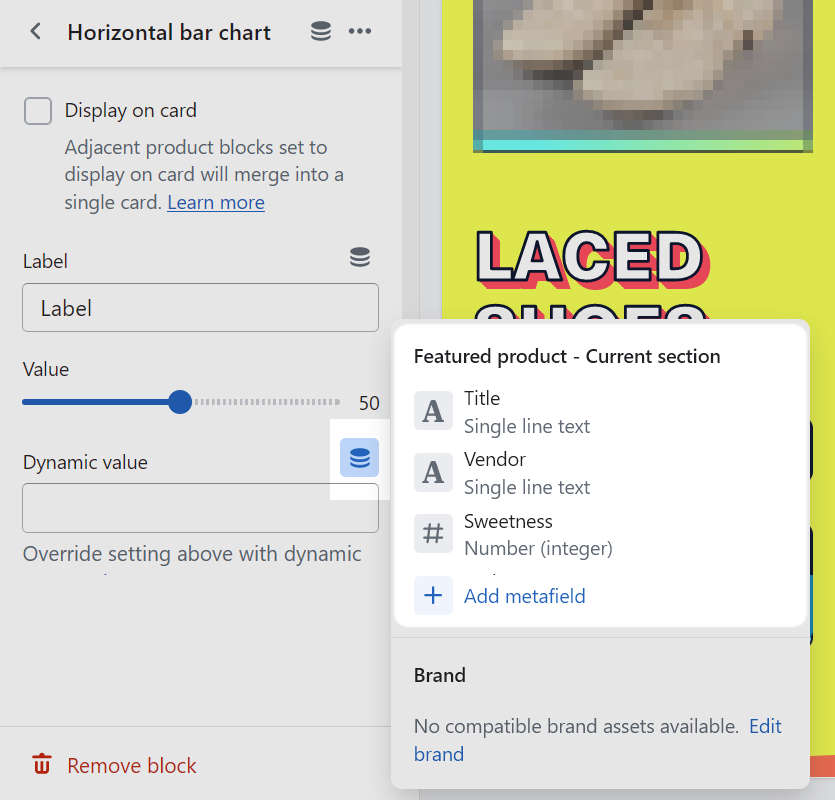
To set up a new dynamic source, select Add metafield. Refer to Create metafields for bar charts and Shopify help: Metafields.
Select Save from the Unsaved changes menu at the top of the page.
Create metafields for bar charts
To create a metafield to use as a dynamic source for Horizontal bar chart blocks:
In your Shopify admin, select Settings > Metafields and metaobjects > Products.
On the Product metafield definitions page, select Add definition, and then add the following information:
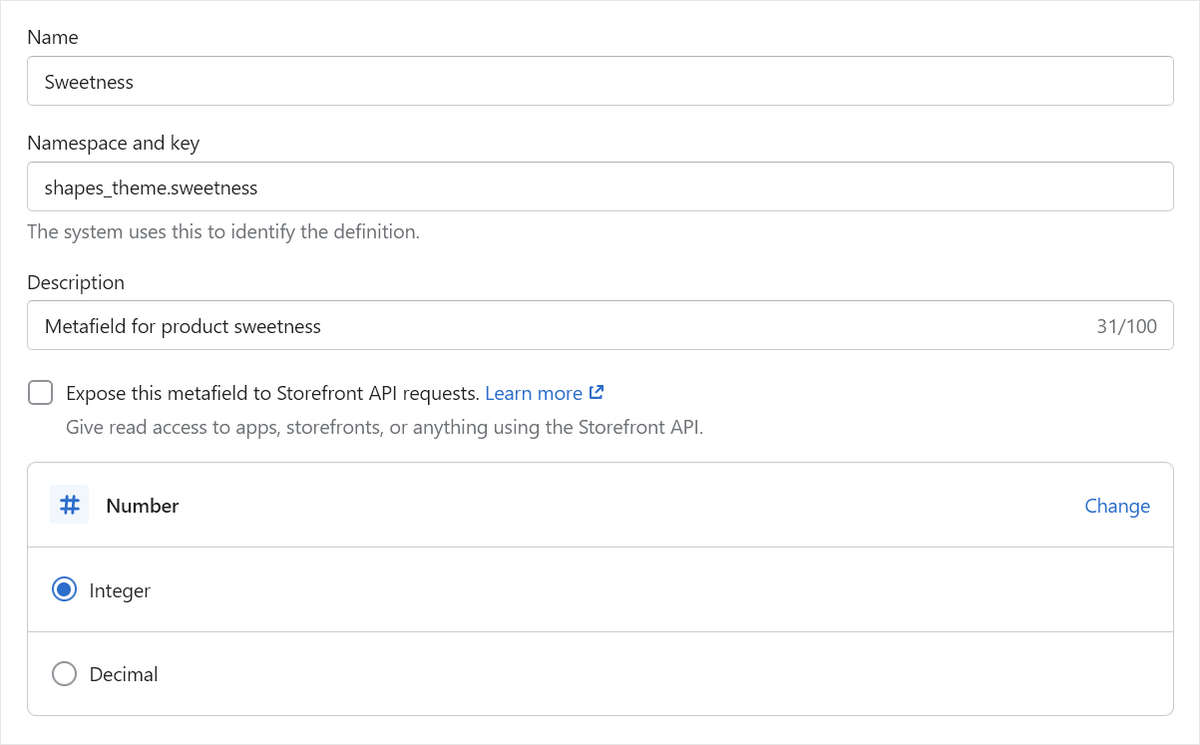
- In the Name field, enter a name for the metafield. For example, enter Sweetness.
- Below the Name field, select the auto-filled
custom.sweetnesselement. In the Namespace and key field, entershapes_theme.sweetnessinstead ofcustom.sweetness. - Set the Type option to One value, then select Integer from the Select type list.
- Optional: Select Add description, and then enter text in the Description field to describe the metafield. For example, enter Metafield for product sweetness.
Confirm that your completed metafield definition is similar to the example in the following image.
Select Save from the Unsaved changes menu at the top of the page.
Set values for a product metafield
To set values for a product metafield:
In your Shopify admin, select Products, and then select a product from the product list.
In the Product metafields area, locate a metafield, and then enter the required values.
For example, in the following image, the Sweetness metafield has the value
60. Note that the value is a whole number, without the percentage symbol%.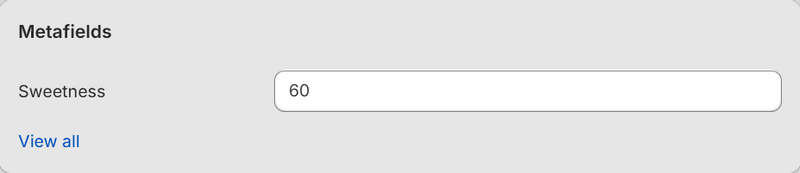
Select Save.
Add the metafield as a dynamic source into a Horizontal bar chart block. Refer to Add dynamic sources to bar charts.