

Appearance
Use metafields on product pages
This guide describes how to add a metafield to a product page for displaying additional product information.
For example, in the following image, a custom metafield displays the Manufacturer's Part Number MPN: 12345, inside a Text block, on a Plain t-shirt product page.
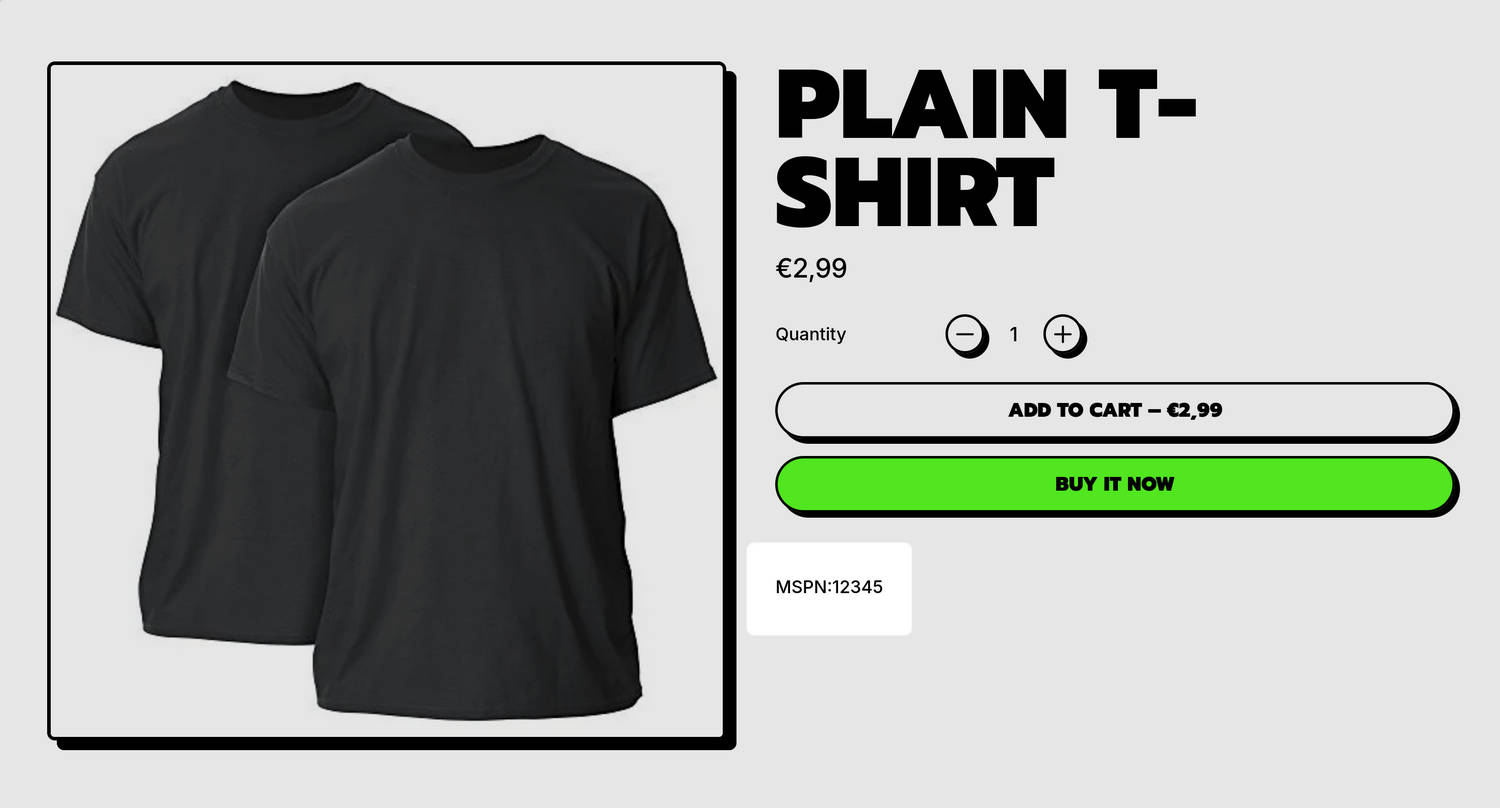
Metafields store information. For example, you can create a metafield to store information about a product's physical dimensions. By adding a metafield to a block in a product section, information from the metafield can be displayed on product pages. Refer to Shopify help: Use metafields and metaobjects with dynamic sources.
Note
For information typically stored in a metafield, Shopify provides standard metafield definitions. Refer to Shopify help: Adding standard metafield definitions.
You can also create custom metafield definitions. Refer to Shopify help: Creating custom metafield definitions.
As an example, this guide creates a custom metafield definition to store a Manufacturer's Part Number (mpn) for a product. The mpn is displayed within a Text block in a product section, and then displayed on a product page.
To create a different custom metafield, adapt the steps in this guide to suit your requirements.
Define your custom product metafield
To define your custom product metafield:
In your Shopify admin, select Settings > Metafields and metaobjects > Products.
On the Product metafield definitions page, select Add definition, and then add the following information:
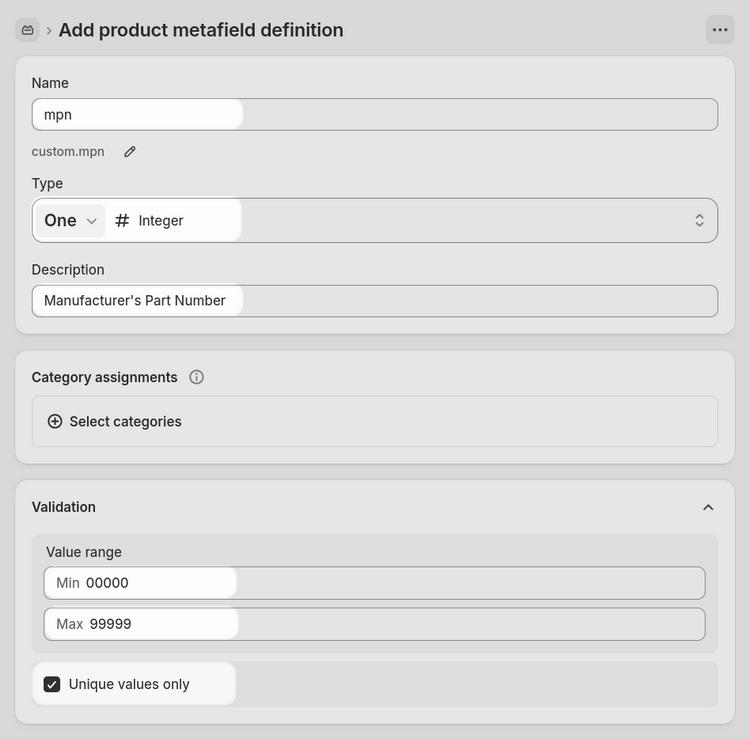
In the Name field, enter a name for the metafield. For example, to create a Manufacturer's Part Number (mpn) metafield, enter mpn.
Below the Name field, note the auto-filled namespace and key. For example, for the mpn metafield, note the
custom.mpnauto-filled namespace and key. You will reuse these later in the Theme editor. Alternatively, to provide a custom namespace and key, select the auto-filled element, and then enter your required namespace and key into the Namespace and key field.Set the Type option to One value or List of values to suit the data your metafield will store. For example, select One value to set the mpn metafield to store a single number. Alternatively, to store multiple values per metafield instance, select List of values.
Choose Select type, and then choose the content type for your metafield from the list. For example, to set the mpn metafield to store integer numbers, select Number > Integer.
Optional: Configure the Description, Category assignments, and Options settings. For information about configuring these settings, refer to Shopify help: Metafields.
Where relevant, set the required Validation rules for your metafield.
For example, to set the mpn metafield to accept one, unique, five-digit integer value per metafield instance:
- Toggle on Unique values only.
- In the Value range > Minimum value field, enter 00000.
- In the Value range > Maximum value field, enter 99999.
Note
Depending on the metafield's content type, different options and validation rules are displayed.
Confirm that your completed metafield is defined correctly.
As an example, the following image shows a completed mpn metafield definition configured to accept one, unique, five-digit integer value per metafield instance.
Select Save, at the top of the page, to save your custom metafield definition.
Set values for your metafield
To set values for your metafield:
Note
The steps required to set values depend on the metafield's content type. Refer to Shopify help: Adding values to metafields.
Adapt the following steps to suit your requirements.
In your Shopify admin, select Products, and then choose a product to open the Product editor.
Locate the Product metafields area.
Select the metafield you defined previously, and then enter the required values into the corresponding field.
For example, select the mpn metafield, and then enter the value
12345.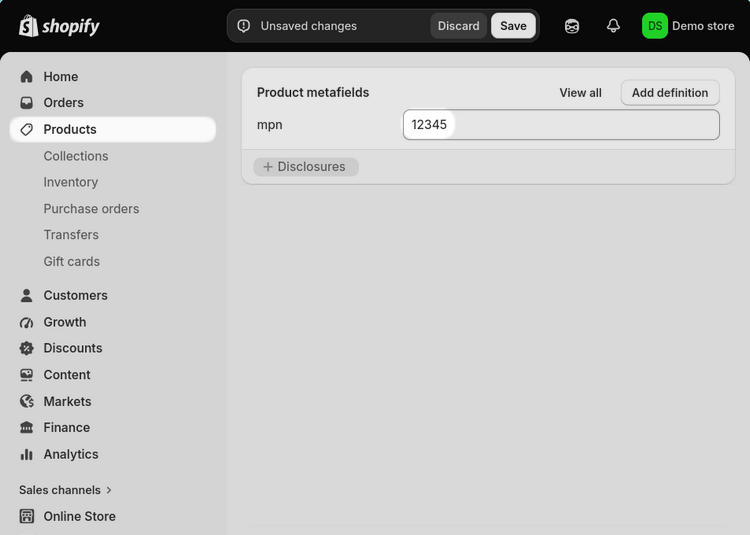
Note
Depending on the metafield's content type, different options are displayed for entering values. Refer to Shopify help: Adding values to metafields.
Optional: Repeat the previous steps to add metafield values to other products.
Select Save to save the values you added to the metafield.
Add your metafield to a product section
To add your metafield to a product section:
Open your theme in the Theme editor.
Use the dropdown menu at the top of the page to select a product page, and then select the product section that will display your custom metafield.
For example, select Products > Default product > Product.
From the section's settings menu, select a block to contain the metafield.
For example, select a Text block.
Note
The block you select must support metafields.
Alternatively, to add a new block, select Add block, choose a block to add, and then select the block you added. Refer to Configure blocks inside a section.
Inside the block settings menu, choose a setting option that supports metafields, and then select the Connect dynamic source icon.
For example, select the Connect dynamic source icon beside the block's Text option.
From the Connect dynamic source menu, select the metafield you defined previously.
For example, select the mpn metafield.
Optional: Enter a prefix to display with the metafield's value. For example, in the Text field, enter the prefix MPN:.
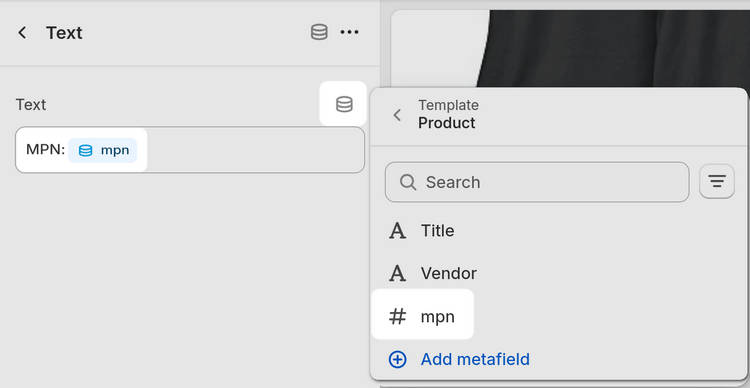
Select Save.
Verify that the metafield displays on the product page correctly.