Appearance
Add custom shapes
This guide describes how to add custom shapes to your store.
Note
This is an advanced customization guide that requires editing theme code. These actions are not supported by Switch Themes or Shopify. We recommend hiring an expert if you are not comfortable editing SVGs, Liquid, HTML, CSS, and JavaScript.
Before you customize a theme, make a backup. Refer to Shopify help: Duplicating themes.
Shapes theme includes over 70 different shapes and 20 blobs you can apply to the media item tiles displayed throughout your store. Refer to Style images and videos with shapes. You can also add custom shapes.
Add a custom shape
The following example uses Figma. The steps are similar for other graphics editors.
To add a custom shape:
Ensure your shape is inside a
200x200pixel square.The
200x200square provides the custom shape's boundaries and it must be this size.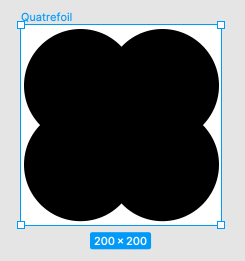
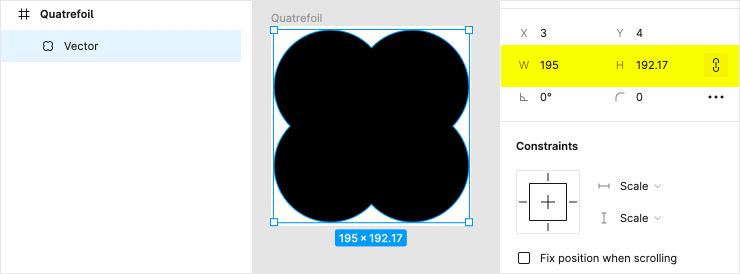
Verify that the height and width of the shape object itself do not exceed
195pixels.This ensures that the borders applied to the shape are not cropped.
Export the SVG.
Ensure you export the
200x200pixel square artboard and not just the shape object directly.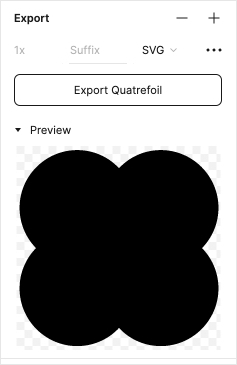
Open the SVG in a code editor, text editor, or notepad.
The SVG code should be similar to the following code.
html<svg width="200" height="200" viewBox="0 0 200 200" fill="none" xmlns="http://www.w3.org/2000/svg"> <path d="M198 60.5217C198 29.4348 172.565 4 141.478 4C125.37 4 110.674 10.7828 100.5 21.8048C90.3263 10.7828 75.6304 4 59.5217 4C28.4348 4 3 29.4348 3 60.5217C3 76.0652 9.21692 89.913 19.1082 100.087C9.21692 110.261 3 124.109 3 139.652C3 170.739 28.4348 196.174 59.5217 196.174C75.63 196.174 90.3261 189.391 100.5 178.369C110.674 189.391 125.37 196.174 141.478 196.174C172.565 196.174 198 170.739 198 139.652C198 124.109 191.783 110.261 181.892 100.087C191.783 89.9133 198 76.0652 198 60.5217Z" fill="black"/> </svg>Copy the data from inside the
<path>element.The data starts after
d="and ends before" fill=".In the previous example, the following data is copied.
htmlM198 60.5217C198 29.4348 172.565 4 141.478 4C125.37 4 110.674 10.7828 100.5 21.8048C90.3263 10.7828 75.6304 4 59.5217 4C28.4348 4 3 29.4348 3 60.5217C3 76.0652 9.21692 89.913 19.1082 100.087C9.21692 110.261 3 124.109 3 139.652C3 170.739 28.4348 196.174 59.5217 196.174C75.63 196.174 90.3261 189.391 100.5 178.369C110.674 189.391 125.37 196.174 141.478 196.174C172.565 196.174 198 170.739 198 139.652C198 124.109 191.783 110.261 181.892 100.087C191.783 89.9133 198 76.0652 198 60.5217ZNote
The copied data is not random numbers; it is a set of coordinates that tell the theme how to render your custom shape.
In the Code editor, expand the snippets directory for your theme.
Open the
shape-defs.liquidsnippet file.Note that this file contains code that defines coordinates for every shape included in the Shapes theme. These coordinate definitions are similar to the code you copied previously.
Inside the
shape-defs.liquidfile, locate the line that contains{%- case shape -%}.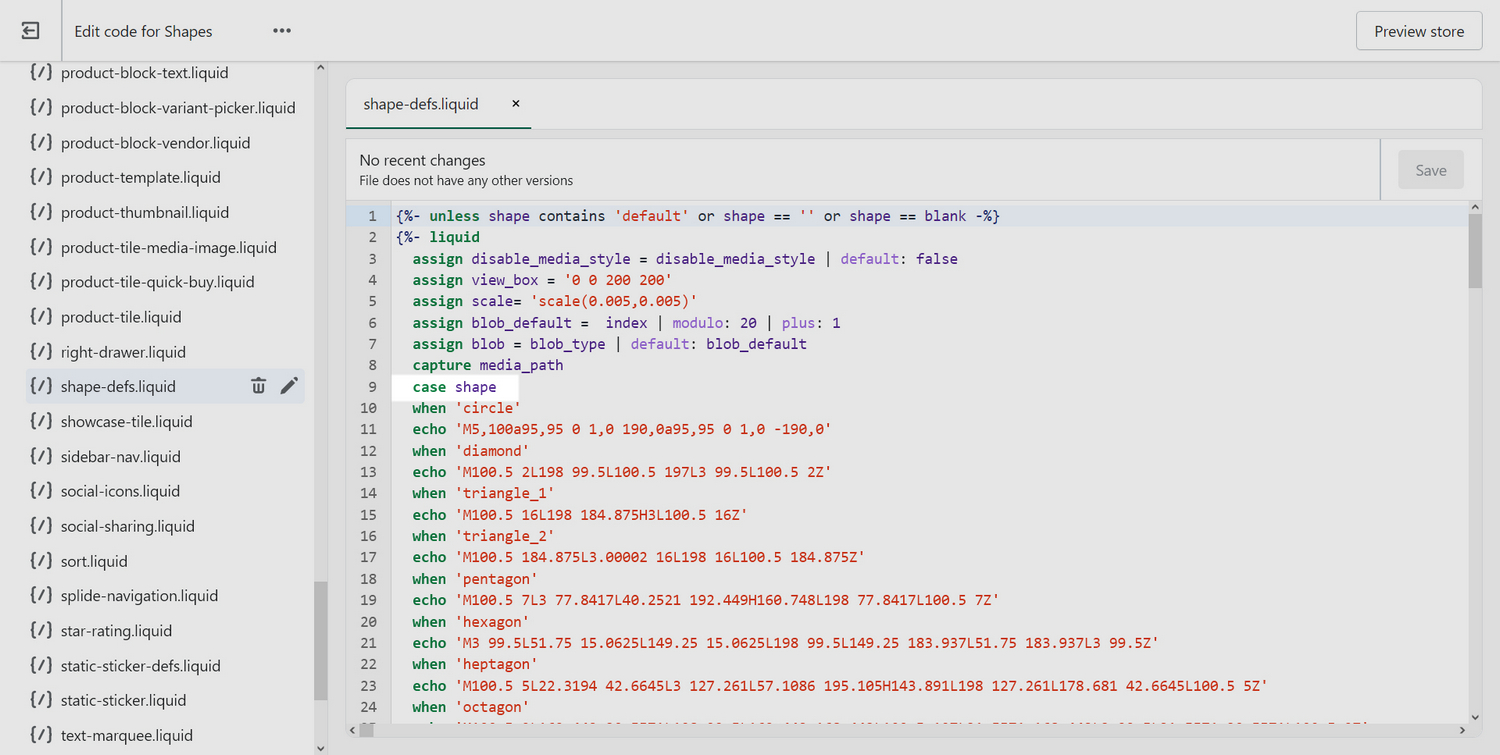
Add a new line below the
{%- case shape -%}line.On the new line, enter
when 'shape_name'.Replace
shape_namewith a name to reference the coordinates for your custom shape. This name must be lowercase, with underscores instead of spaces.Create a second new line below the line you added previously.
On this second new line, enter
echo 'SHAPE COORDINATES COPIED FROM SVG FILE'.Replace
SHAPE COORDINATES COPIED FROM SVG FILEwith the coordinates you copied previously from your SVG file.Verify that the updated lines in the
shape-defs.liquidfile are similar to the following.htmlwhen 'shape_name' echo 'SHAPE COORDINATES COPIED FROM SVG FILE'For example, the following code adds a custom shape named
quatrefoilinto theshape-defs.liquidfile, with coordinates.htmlwhen 'quatrefoil' echo 'M198 60.5217C198 29.4348 172.565 4 141.478 4C125.37 4 110.674 10.7828 100.5 21.8048C90.3263 10.7828 75.6304 4 59.5217 4C28.4348 4 3 29.4348 3 60.5217C3 76.0652 9.21692 89.913 19.1082 100.087C9.21692 110.261 3 124.109 3 139.652C3 170.739 28.4348 196.174 59.5217 196.174C75.63 196.174 90.3261 189.391 100.5 178.369C110.674 189.391 125.37 196.174 141.478 196.174C172.565 196.174 198 170.739 198 139.652C198 124.109 191.783 110.261 181.892 100.087C191.783 89.9133 198 76.0652 198 60.5217Z'In the following image, the previous code example is added into the
shape-defs.liquidfile in the Code editor.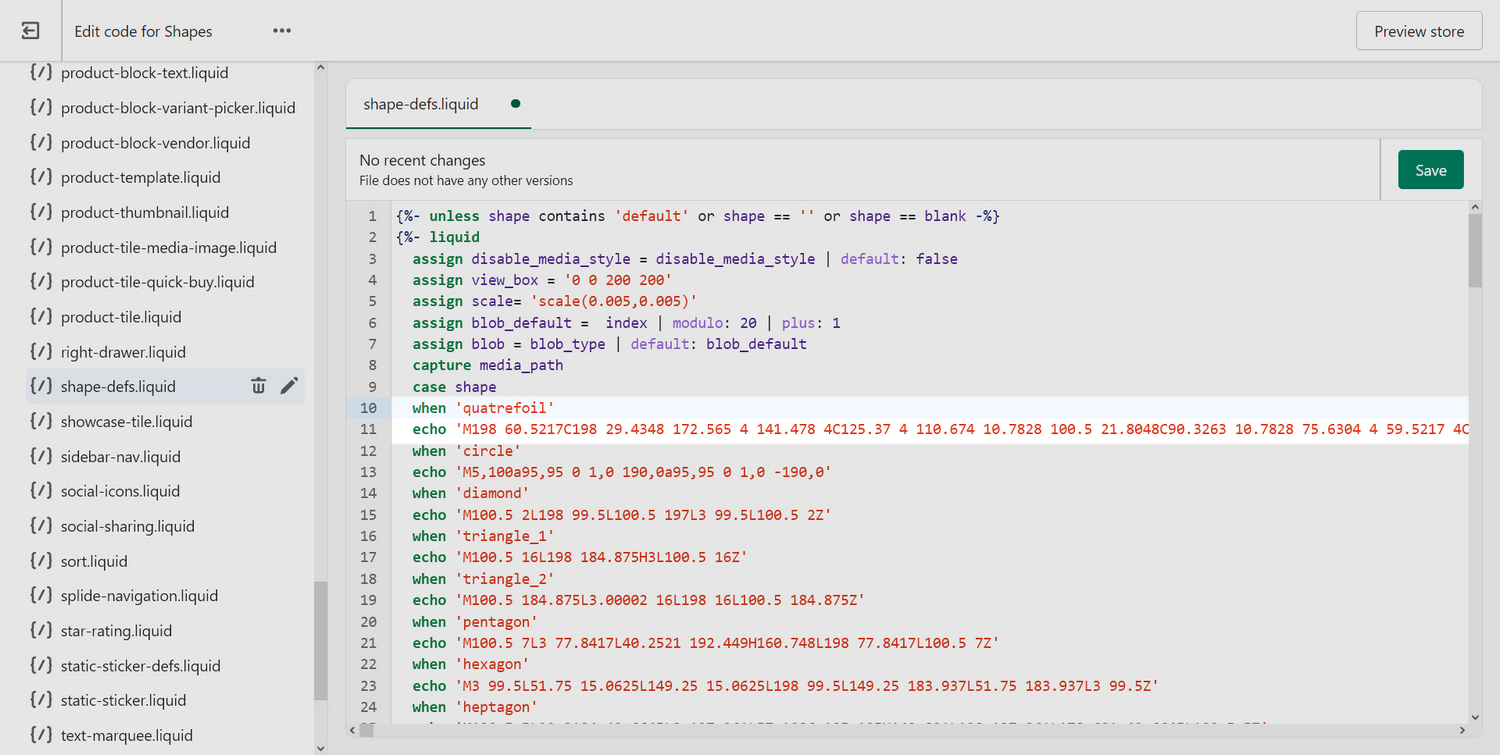
Select Save to save your file changes.
Make your custom shape available for use
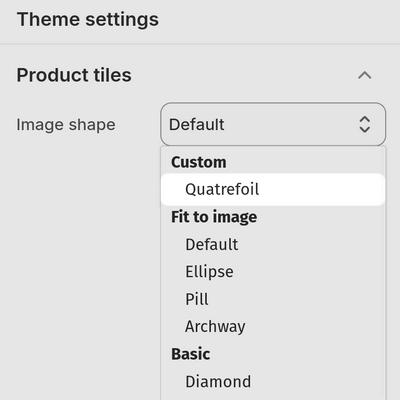
Many of the Shapes theme's page templates and files provide a setting for choosing the shape that's applied to the media item tiles. For example, this setting is available as the Image shape setting in Theme settings > Product tiles. To use this setting to apply your custom shape to media item tiles, add your custom shape into the setting's list of options.
As an example, the following steps add a custom "quatrefoil" shape to the list of Image shape options in Theme settings > Product tiles. To make your custom shape available for selection elsewhere, repeat these steps for each custom shape and .liquid theme file that has a corresponding setting.
To make your custom shape available for use:
In the Code editor, expand the config directory for your theme.
Open the
settings_schema.jsonfile.Inside the file, locate the
product_tile_media_shapesetting definition.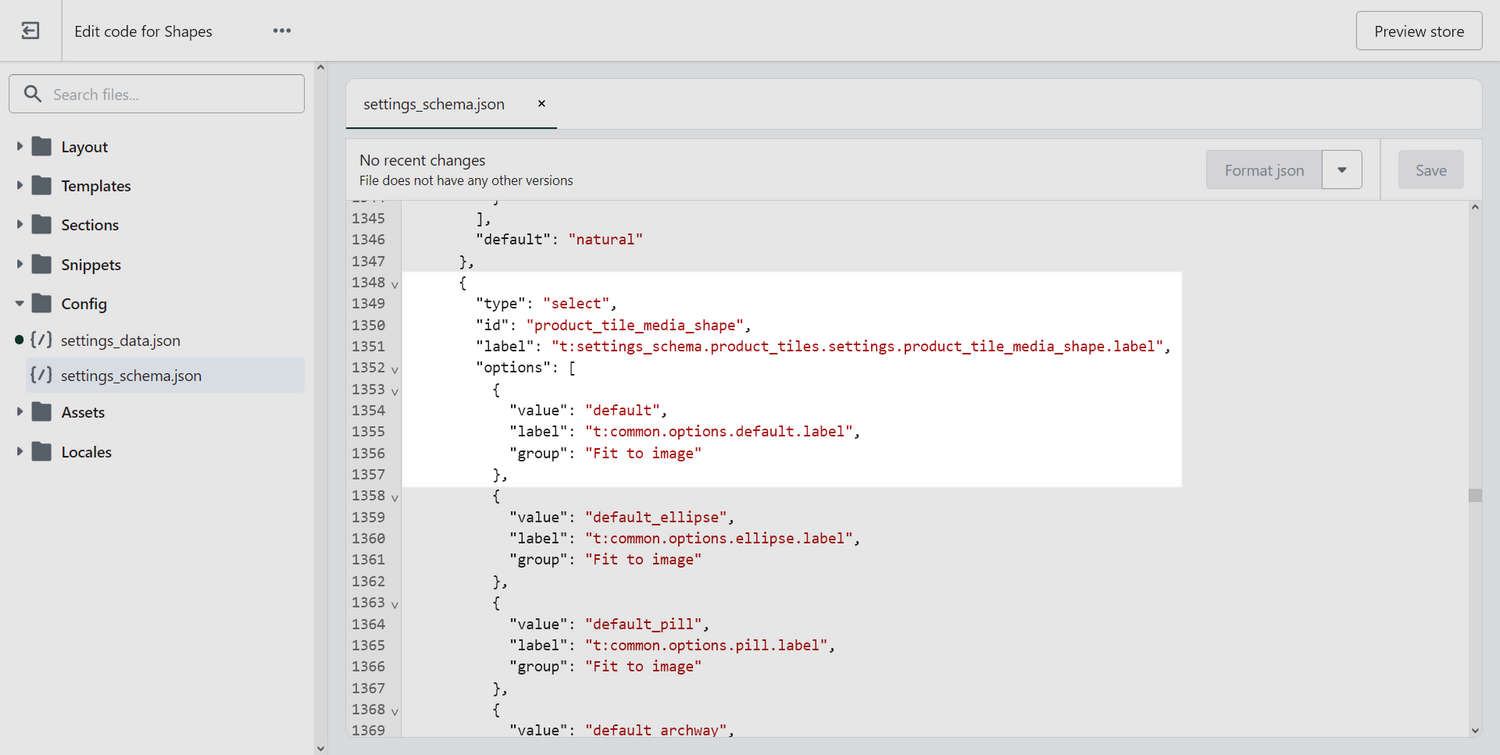
Note that the shape's settings definition contains key/value data similar to the following:
json{ "value": "shape_name", "label": "Shape name", "group": "Group name" },Key name Description value This is the value that Liquid reads, in the code. Use this key/value to add the lowercase name that you used previously for the custom shape name. label This key/value defines what's displayed in the Theme editor settings menu for selecting the shape. group Use this key/value to specify the shape's container group in the Theme editor settings menu. This key/value is optional. To add your custom shape into the list of options, inside the
optionslist, enter key/value data for your custom shape.For example, the following key/value data adds a custom shape named
quatrefoilto the setting options.json{ "type": "select", "id": "product_tile_media_shape", "label": "Image shape", "options": [ { "value": "quatrefoil", "label": "Quatrefoil", "group": "Custom" }, { "value": "default", "label": "Default", "group": "Fit to image" }, ...In the following image, the previous key/value data is added into the
settings_schema.jsonfile in the Code editor for the customquatrefoilshape.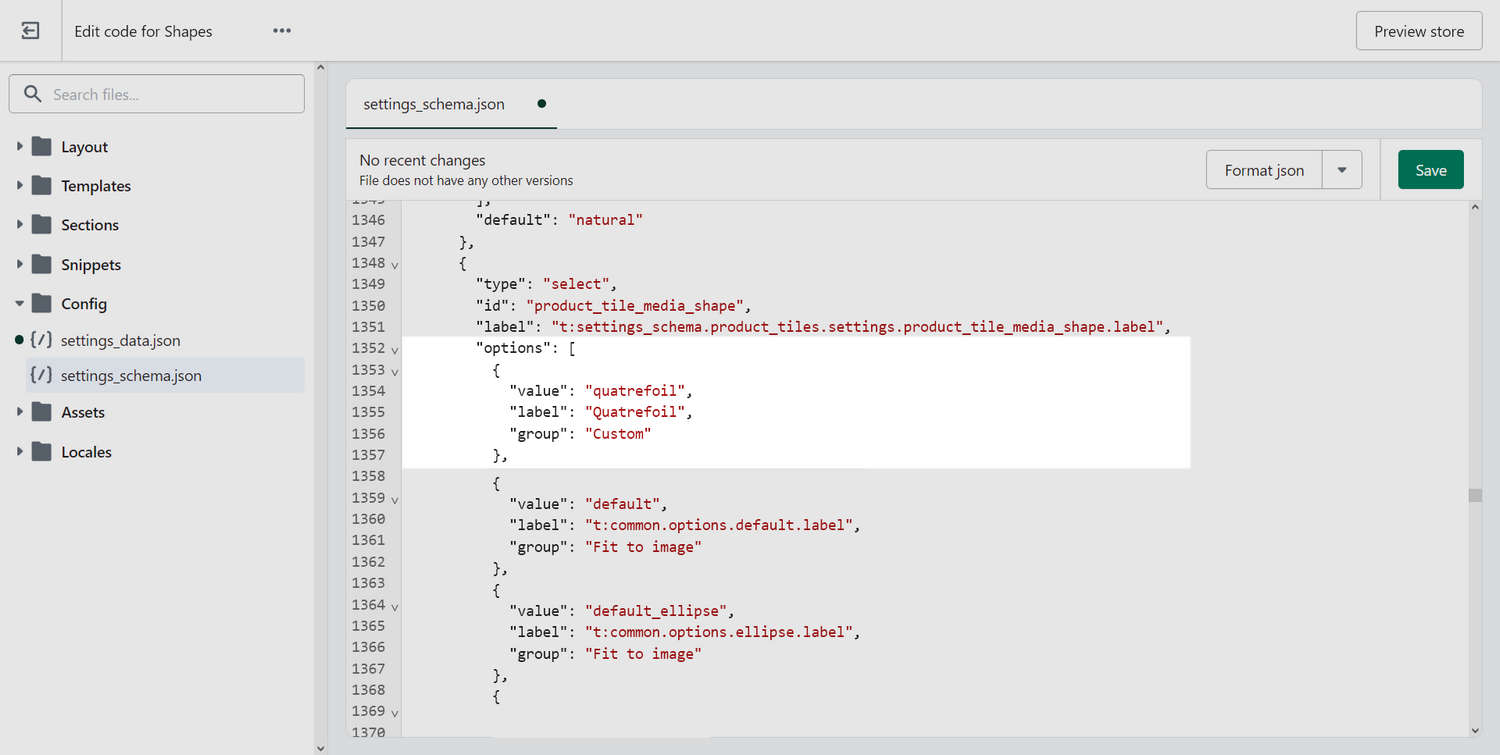
Select Save to save your file changes.
Return to the Theme editor and verify that your custom shape can now be selected from the appropriate settings menu.
For example, in the following image, the custom Quatrefoil shape is listed as an option in Theme settings > Product tiles > Image shape.