

Appearance
Tags
This guide describes the Theme editor's Theme settings > Tags menu options.
Use the menu to set up style options for tags. Tags can be displayed on product tiles and as blocks on Product pages. Refer to Shopify help: Creating and using tags in Shopify.
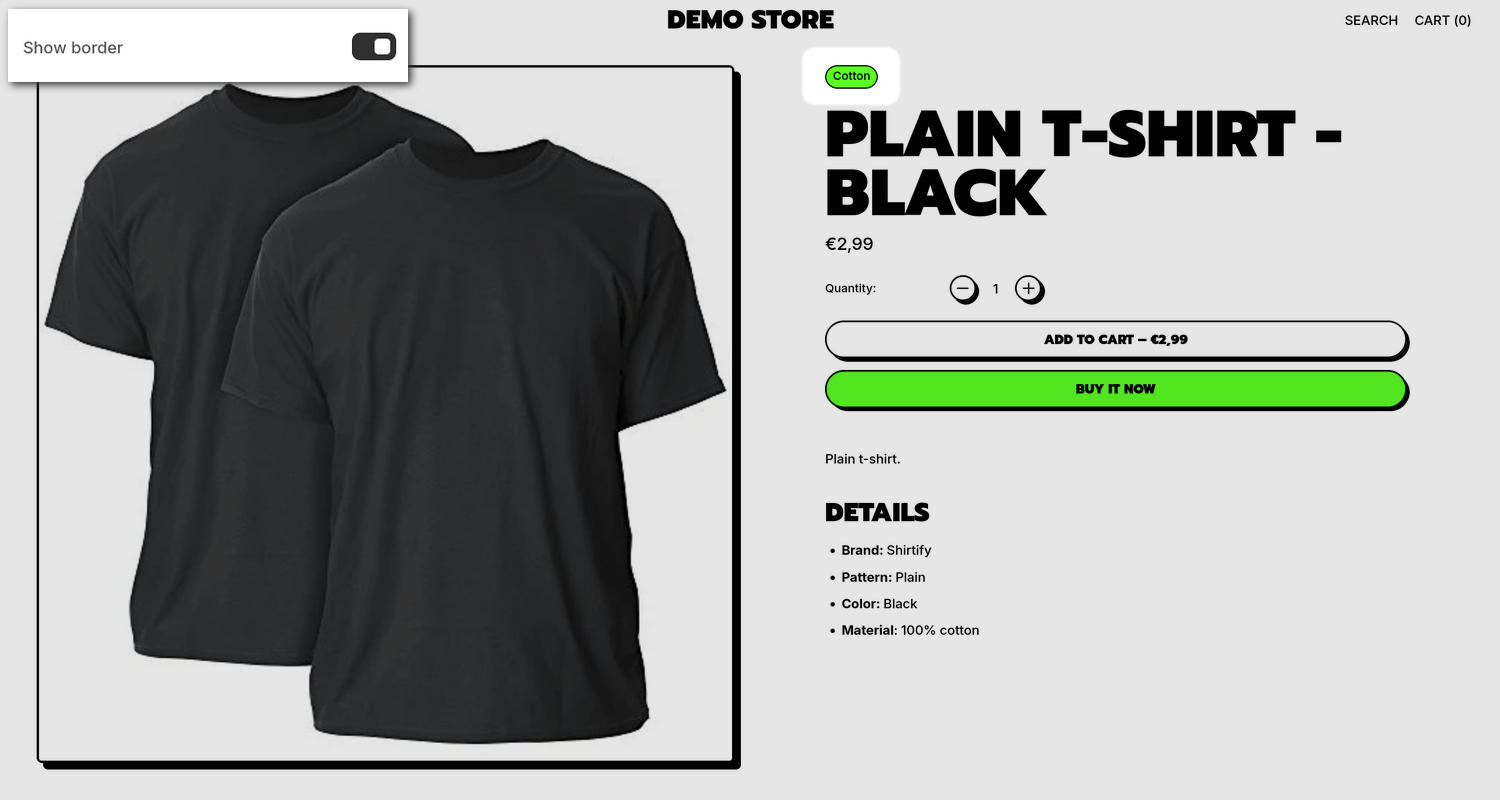
The previous image shows a Product pages section on a store's Default product page. In the upper left, part of the Theme editor's Theme settings > Tags menu is displayed. The menu's Show border option is enabled. With this option enabled, borders are displayed around each tag in the section. For example, in the upper left corner, borders are displayed around the Cotton tag.
For general guidance with adjusting a theme setting, refer to Settings overview and Shopify help: Theme settings.
Set up tags
To set up tags:
In the Theme editor, go to Theme settings > Tags.
Select a setting described in the following table.
| Setting name | Description |
|---|---|
| Only include these tags | In the Only include these tags field, enter the names of the specific tags you want to display. List each tag on a separate line. If this field is empty, all tags will be shown. |
| Tag style > Background color | Use the Background color option to set a background color for tags. The background you select is from the color scheme applied to the containing section or block. The options are Transparent, Accent 1, Accent 2, Card, or Text. |
| Tag style > Show border | Use the Show border option to show or hide borders around each tag. |
Note
To connect a metafield to a setting that supports metafields, select the Connect dynamic source icon displayed beside the setting in the Theme editor.
To learn how to connect a metafield to a supported setting, refer to Shopify help: Connecting metafields to your theme by using the Theme editor.