Appearance
Link related products with Product groups
This guide explains how to use Product groups to display related products in a product section, so customers can quickly navigate between them from a product page.
With our Product groups feature, products that exist as distinct product records can be linked together as siblings. On a product page, the feature adds a Product group block with a customizable picker. Customers can use the picker to choose between sibling products in the group.
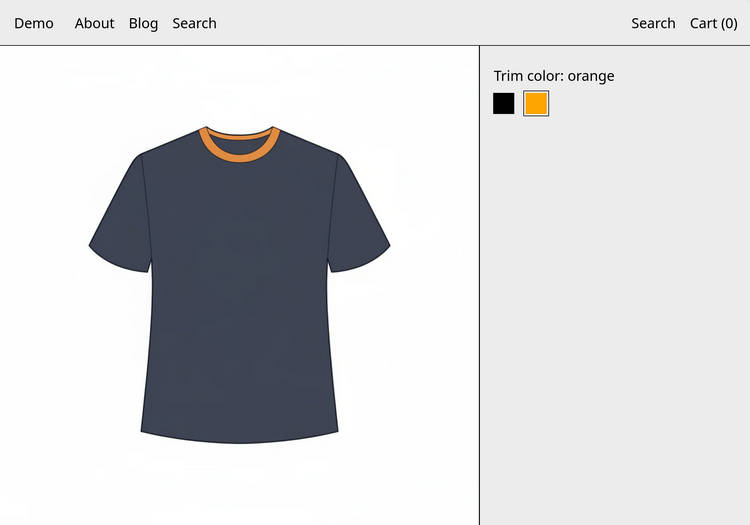
For example, the previous image shows a product page with a Product pages section that contains a Plain t-shirt - orange product. On the right side of the section, a Product group block contains a Trim color picker. The picker shows black and orange product options represented by color swatch icons. Customers select a picker icon to choose a collar color option. Selecting each option opens the corresponding product page.
How this guide implements a Product group
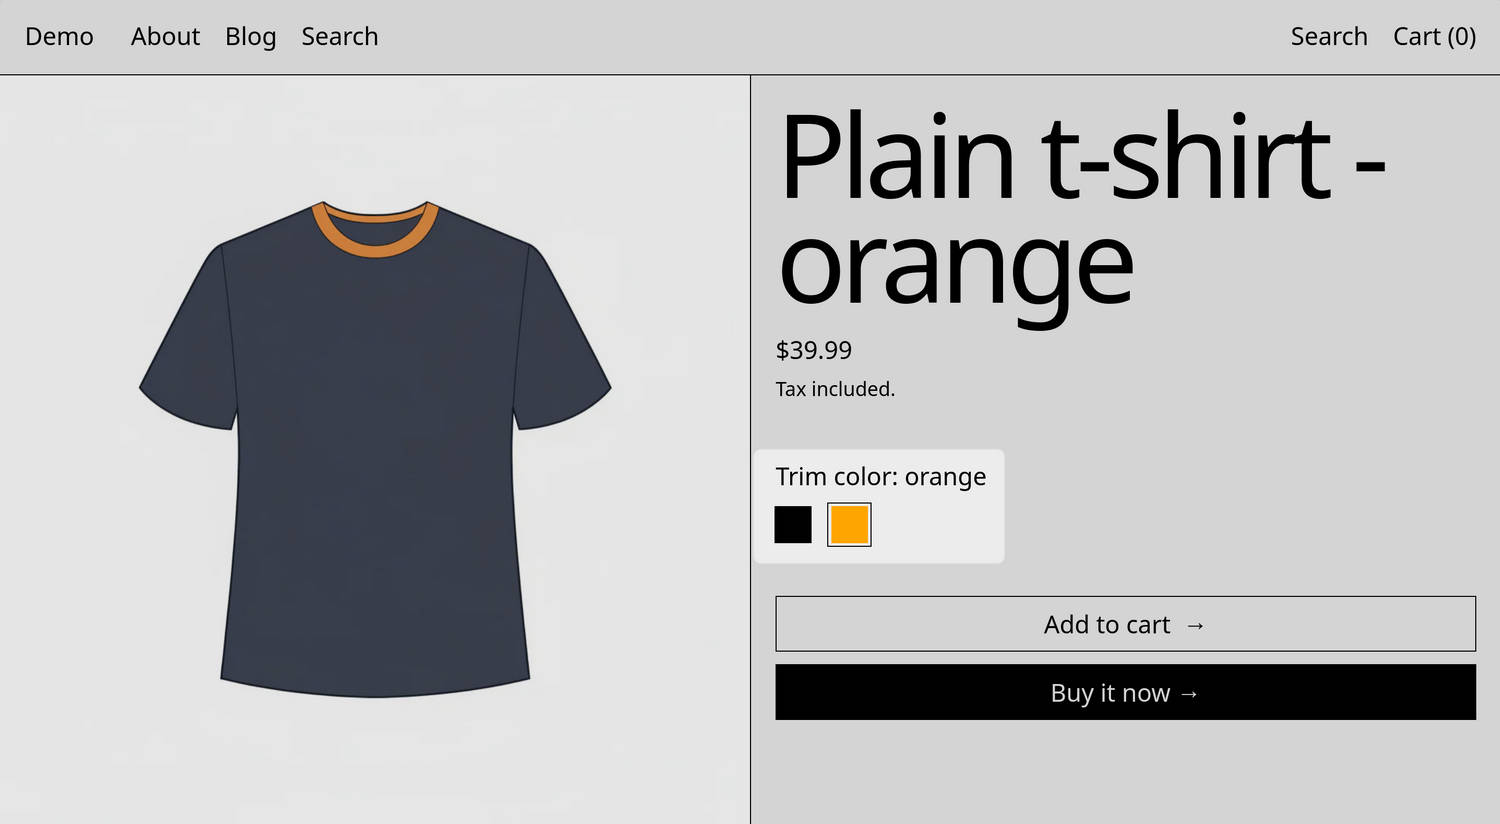
In this guide, we use the picker shown in the previous image as an example. We use two distinct t-shirt products: the first t-shirt has a black collar trim, and the second has an orange collar trim. We configure a product group block to display a picker inside a Product pages section. The picker allows customers to choose between collar color options on a default product page.
Adapt the steps in this guide to suit your store's specific requirements.
To set up the Product group described in this guide, you'll:
- Define a metaobject structure
- Define a custom product metafield for your metaobject
- Create a product group
- Link products to your product group
- Configure a product section to display your product group
Define a metaobject structure
In your Shopify admin, go to Settings > Metafields and metaobjects.
In the Metaobject definitions pane, select Add definition.
Note
If you're creating your first metaobject, in the Define your first metaobject pane, select Add definition.
On the Add metaobject definition page, in the Name field, enter Product group.
In the Fields pane, add the fields defined in the following table. Select Add field to add each new field, as needed.
Important
Enter the field labels exactly as specified in the following table.
Field label Mark as required Field category Field type Name Yes One Single line text Products Yes List of values Product Label No (optional) One Single line text Common title part No (optional) One Single line text 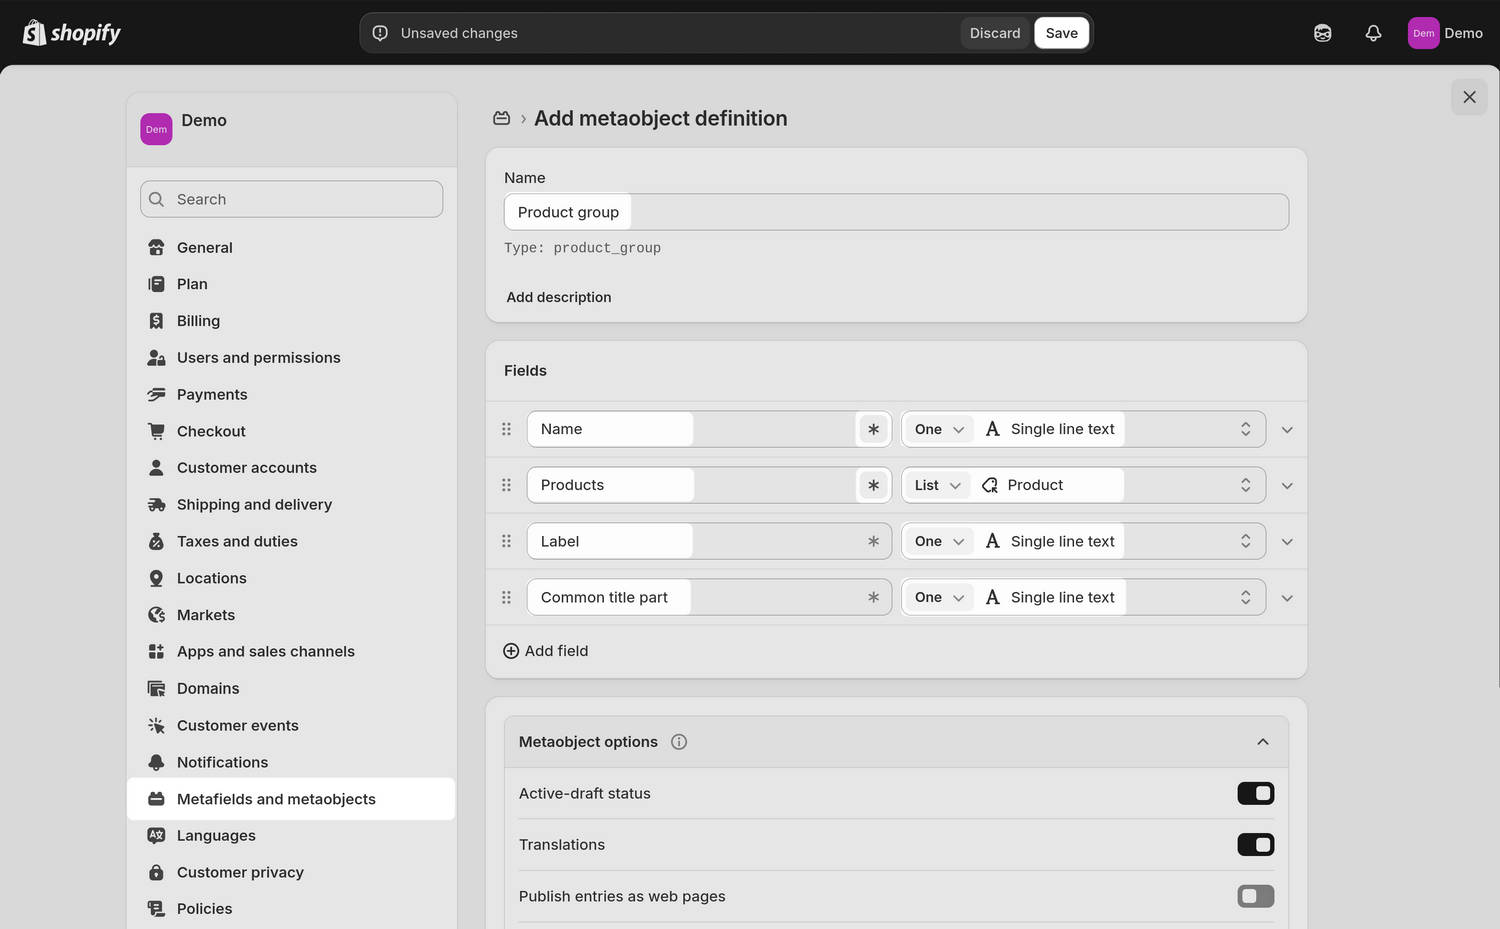
Note
Your completed metaobject structure definition includes the following fields:
- Name is used inside Shopify admin to identify the Product group entry.
- Products lists all products that belong to this Product group. Baseline reads this list to determine which products to display in the picker.
- Label specifies the label text to display alongside the picker inside the Product group block. For example, “Trim color”.
- Common title part stores the part of a product's title that's shared with other products in the product group. For example, the prefix "Plain t-shirt -". Baseline can be configured to remove this shared part when displaying button labels inside the Product group block.
For information about metaobjects, refer to Shopify help: Metaobjects.
Select Save to save your custom metaobject structure definition.
Define a custom product metafield for your metaobject
In your Shopify admin, go to Settings > Metafields and metaobjects.
Select Products, and then choose Add definition.
In the Name field, enter a suitable name for your custom product metafield definition.
For example, enter Product group.
Use the Type dropdown to select One, choose Metaobject, and then select the metaobject you created previously.
For example, select the Product group metaobject you created previously.
Optional: Select Add description, and then enter a description for your metafield in the Description field.
Note
Note the namespace and key for your metafield as you'll need them later in this guide. For example, note the namespace and key
custom.product_group.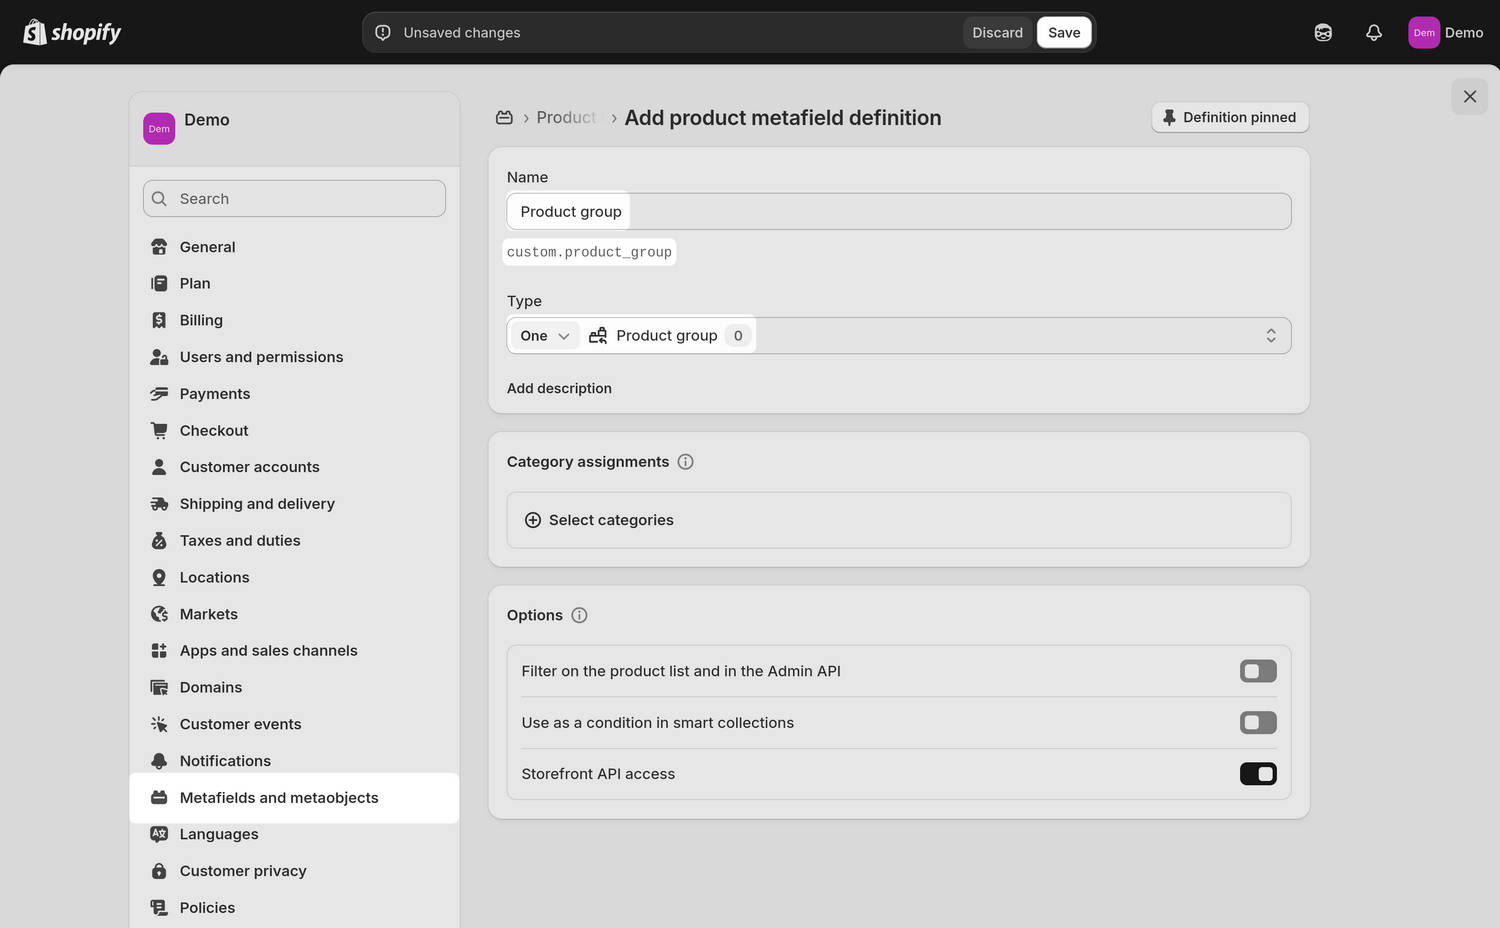
Select Save to save your custom product metafield definition.
Create a product group
After you've created your metaobject structure and metafield definition, you can group related products as siblings.
In your Shopify admin, go to Content > Metaobjects, and then select the Product group metaobject you created previously.
Select Add entry.
Enter a Name for your product group. For example, enter Trim color.
Note
The name you enter is primarily for your internal reference.
In the Products field, choose Select products, select each product you want to include in the group, and then choose Add.
For example, select the Plain t-shirt - black product, and then select the Plain t-shirt - orange product.
Optional: In the Label field, enter text to display as a label for the picker inside the Product group block. For example, enter Trim color.
Optional: In the Common title part field, enter part of the product's title that's shared among products in the product group. For example, enter the prefix Plain t-shirt -.
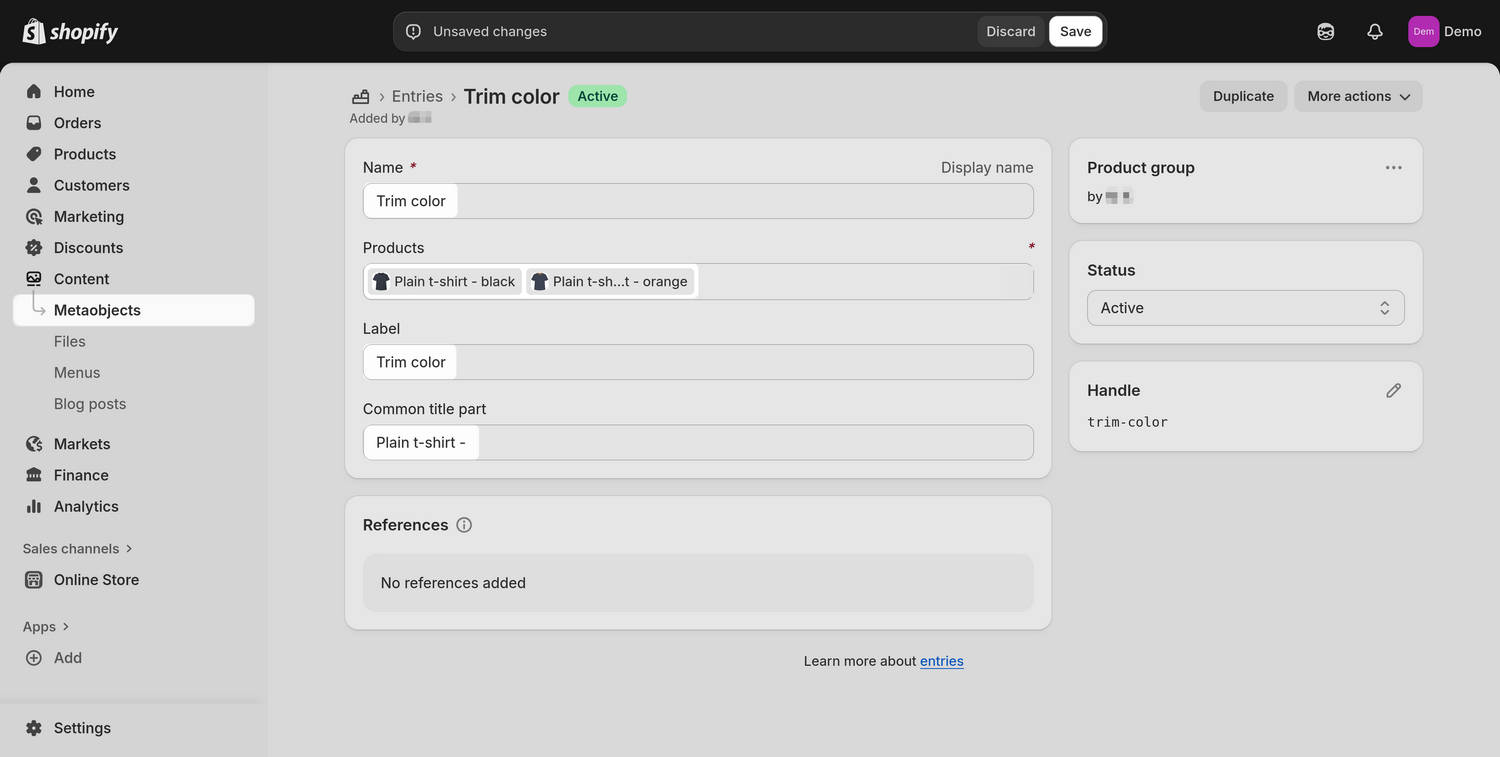
Select Save to save your product group.
Link products to your product group
In your Shopify admin, go to Products, and then select a product that you included in your product group. For example, select the Plain t-shirt - orange product.
In the Product metafields pane, select the Product group metafield you created previously.
Choose Select entry and then select the product group entry that this product belongs to. For example, select Trim color.
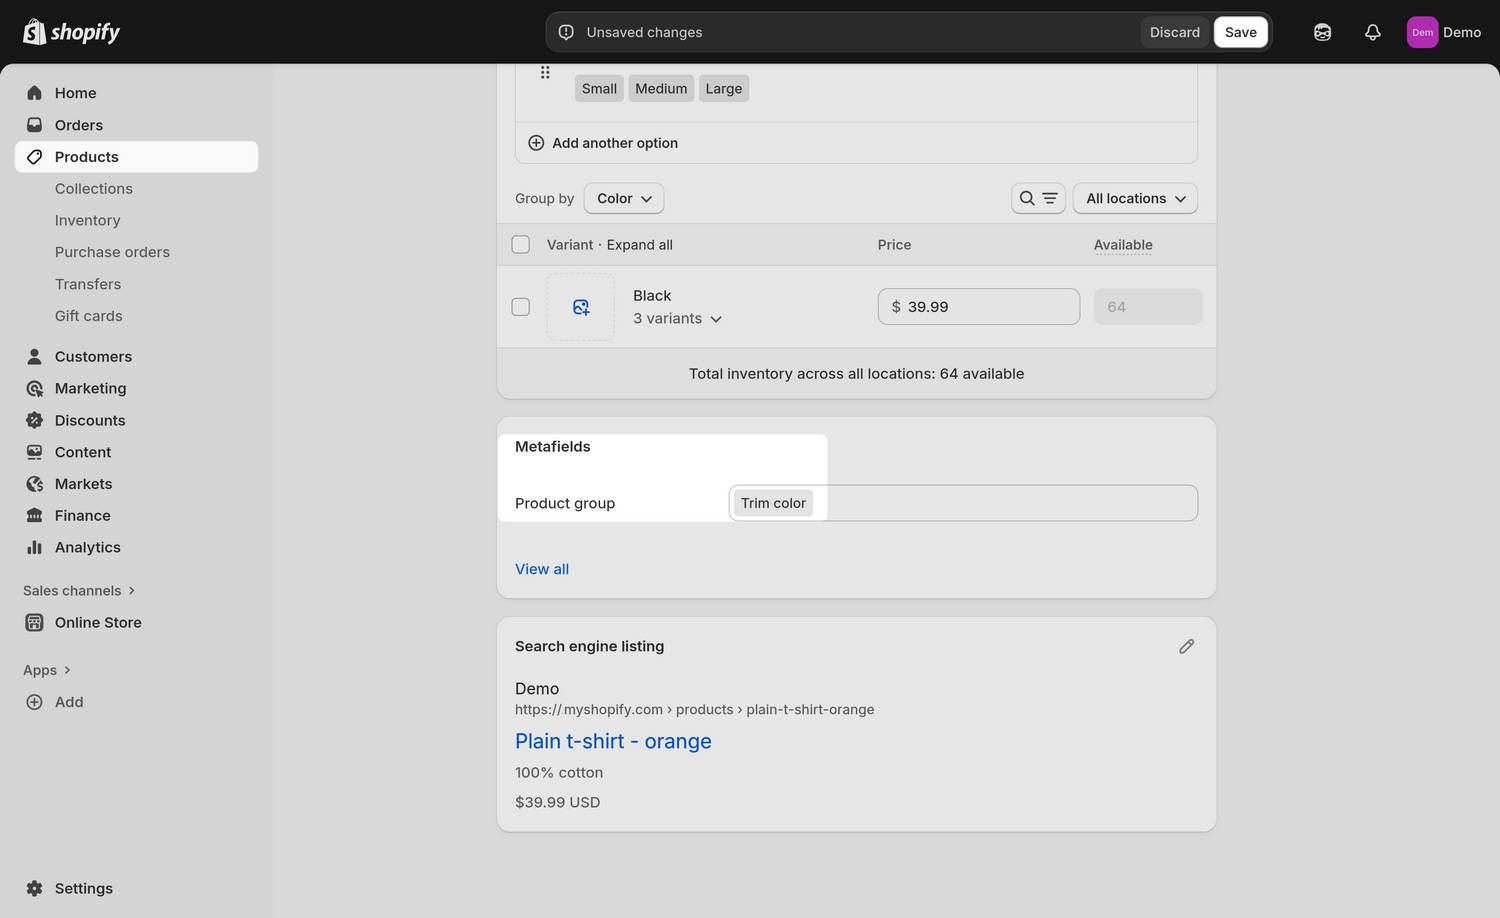
Select Save to save your changes.
Repeat these steps to add metafield entries for each product you want to link to the product group.
Note
The Product group block only displays a picker on product pages for the products that belong to your product group.
Configure a product section to display your product group
In your Shopify admin, go to Sales channels > Online Store > Themes.
Locate the theme you want to edit. Next to the theme's name, select Edit theme to open the Theme editor.
At the top of the Theme editor, use the template selector to choose a template that contains a product section to display your product group. For example, select Products > Default product.
Use the Theme editor's product picker to select a product to preview from your product group.
In the sidebar, find the product section where you want to display your product group. For example, find the Product pages section.
Expand the section menu, select Add block, choose Product group, and then select the Product group block you added.
In the block's settings, enter your metafield namespace and key in the Product group metafield key field. For example, enter custom.product_group.
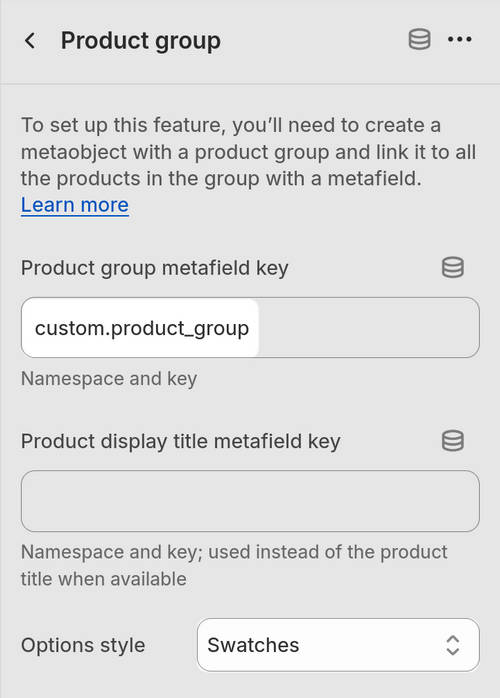
- Optional: Adjust the remaining block settings to suit your requirements. For example, to set the picker to display options as color swatch icons, set Options style to Swatches.
Note
For information about the Product group block settings, refer to Product pages.
Select Save to save your changes.
Preview the product page to confirm that products from the product group are displayed.